-
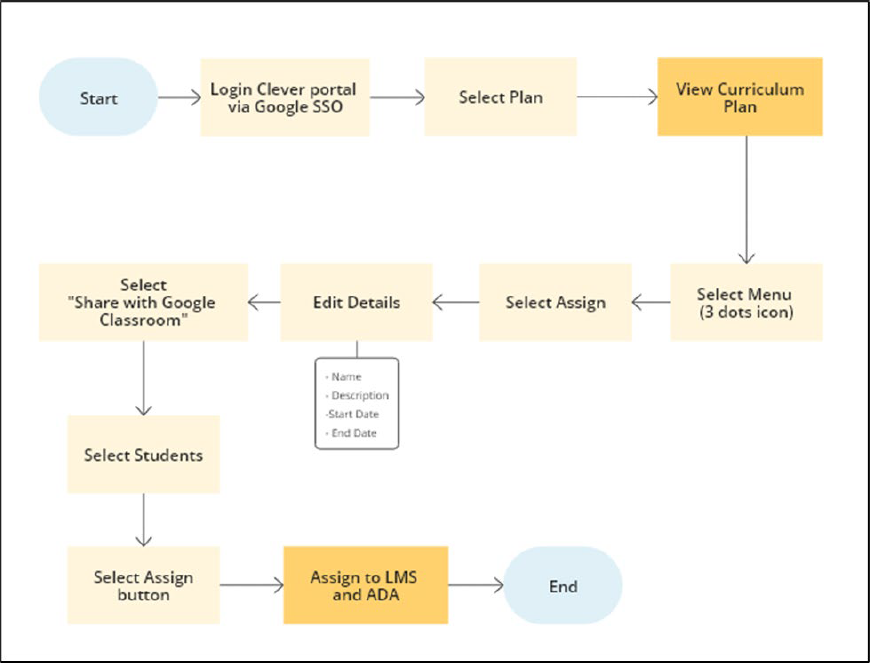
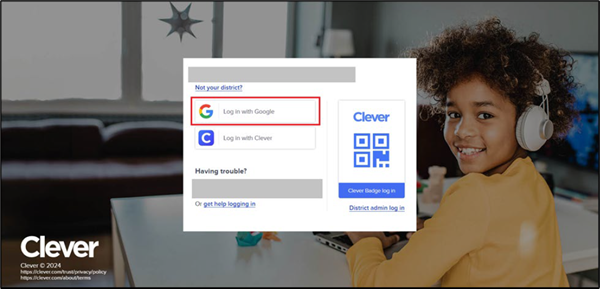
The teacher will login to their Clever account using the Log In with
Google SSO button.
-
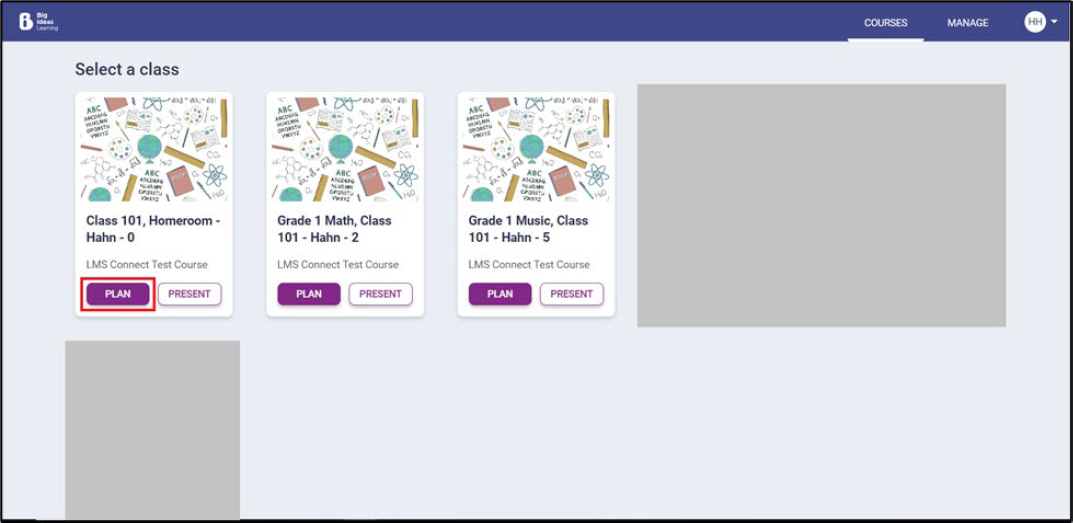
On successful login, the teacher will view their Classes on the ADA dashboard.
Selecting Plan on the course card will redirect the
teacher to the Course Details page, where they can view all the assessments.
-
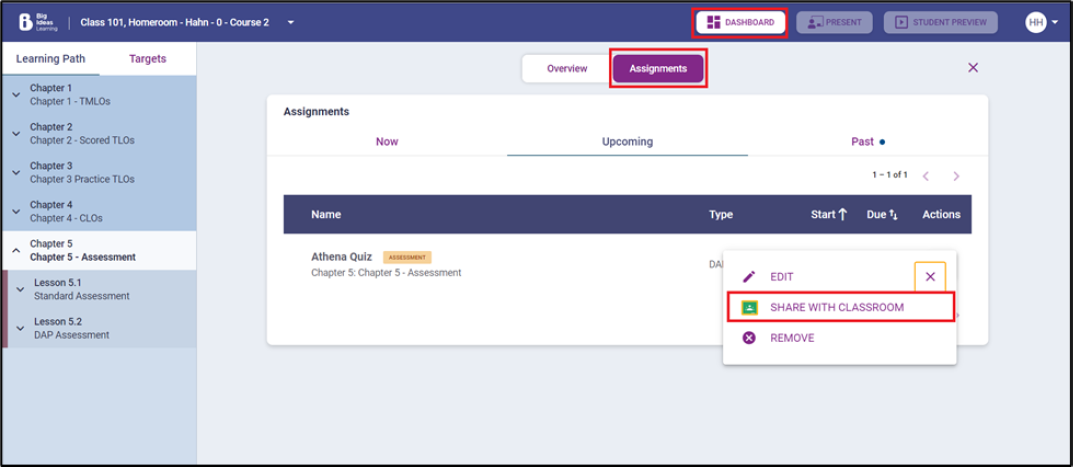
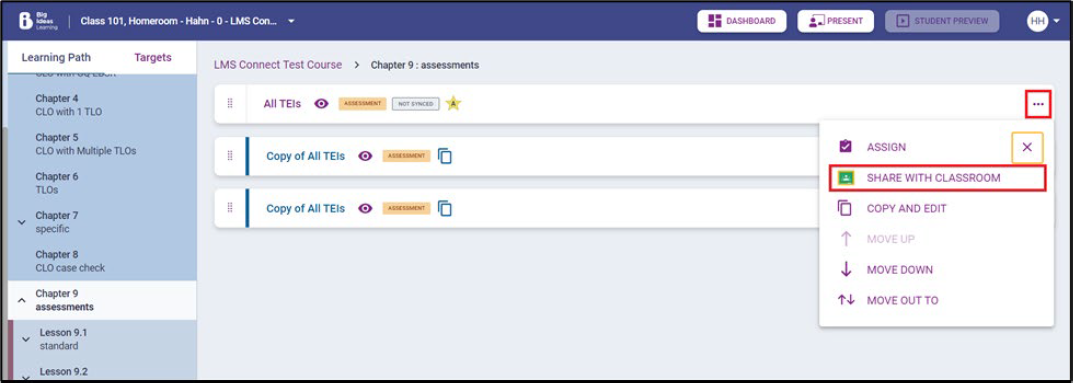
The teacher can assign assessments by clicking the three dots menu icon and
selecting the Assign option.

-
Upon selecting Assign, a Create Assignment modal will
open. The teacher will fill in the following information.
- Name of the assignment: Enter name manually.
- Description of the assignment: Enter description manually.
- Start Date: Select the start date of the assignment from the date picker.
- End Date: Select the end date of the assignment from the date picker.
- Select Share with Google Classroom checkbox.
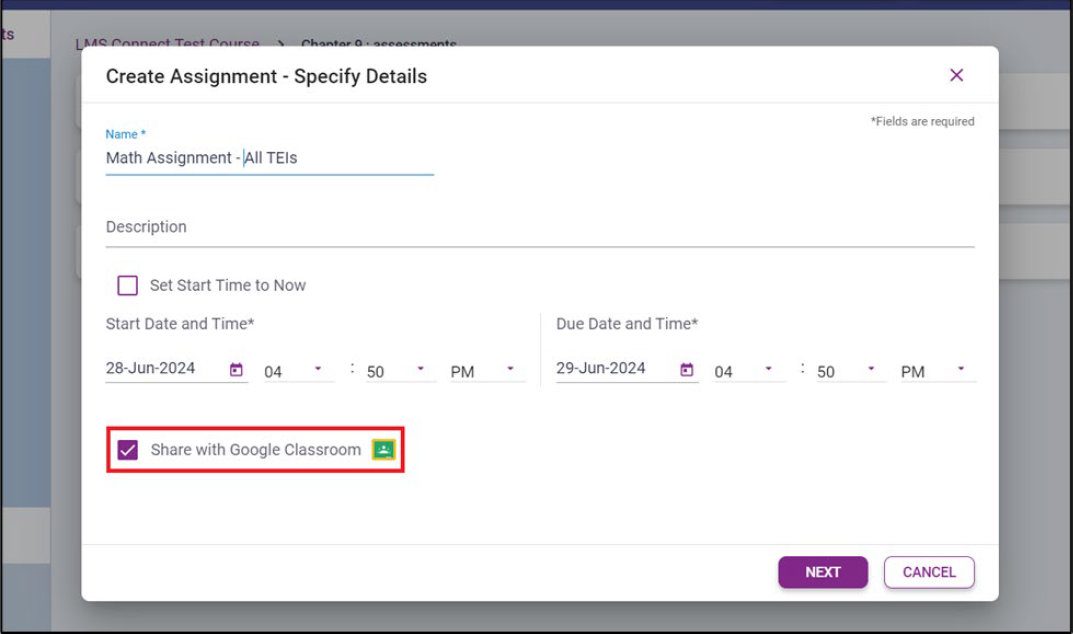
If the Teacher unchecks the Share with Google Classroom checkbox, the teacher can still share the assignment from the Assignment Listing page after.
-
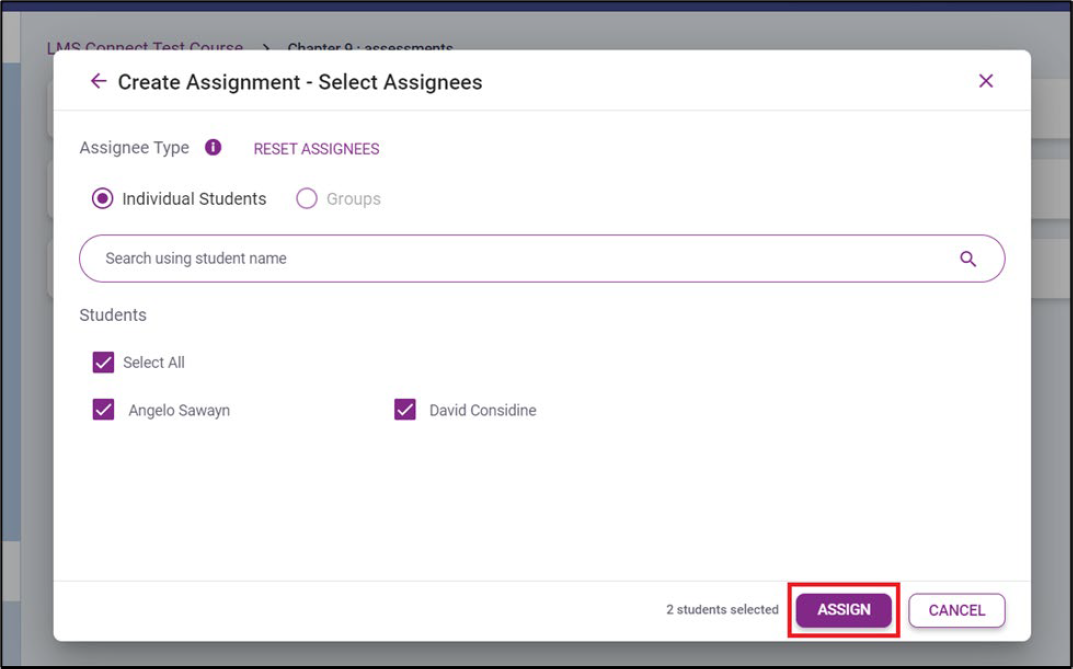
Choose the students who will take the assignment and select
Assign.
-
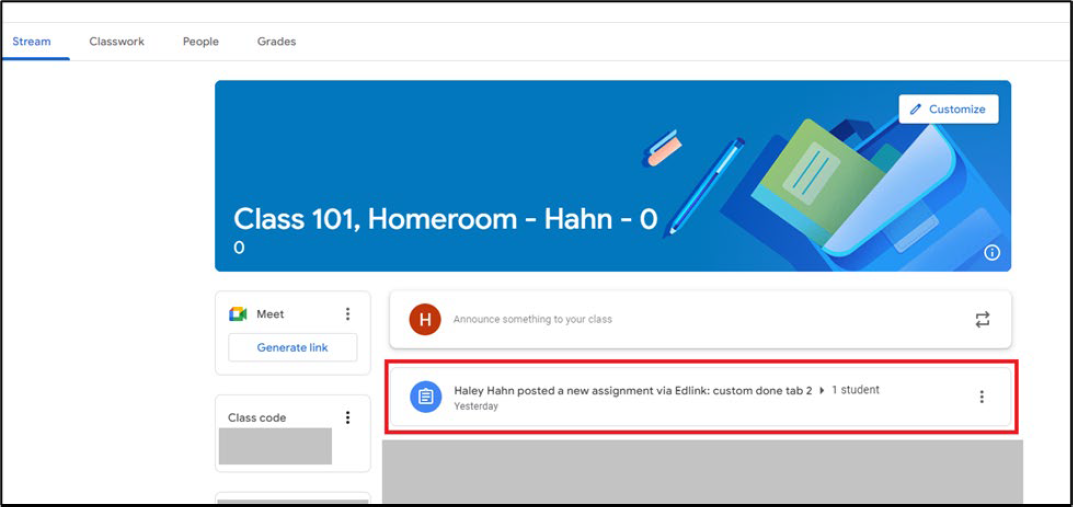
When the Teacher clicks on Assign, the assessment will
now be assigned to the selected students in My Ada Math and Google Classroom.
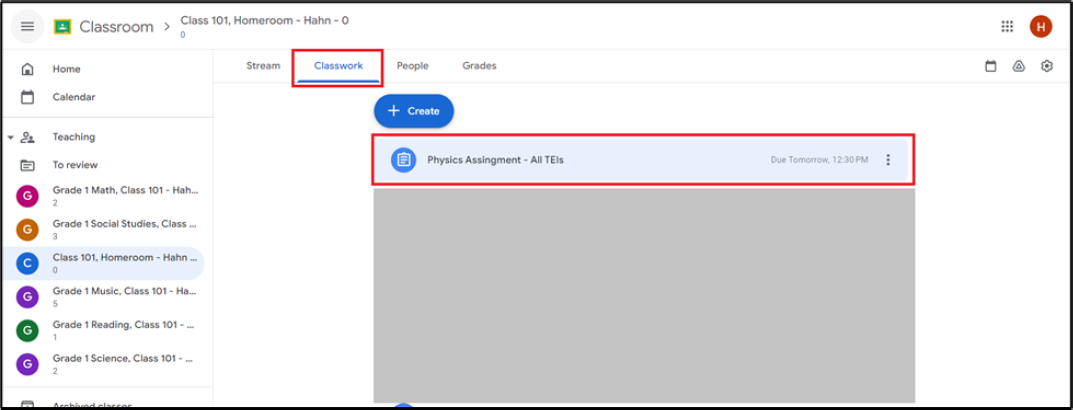
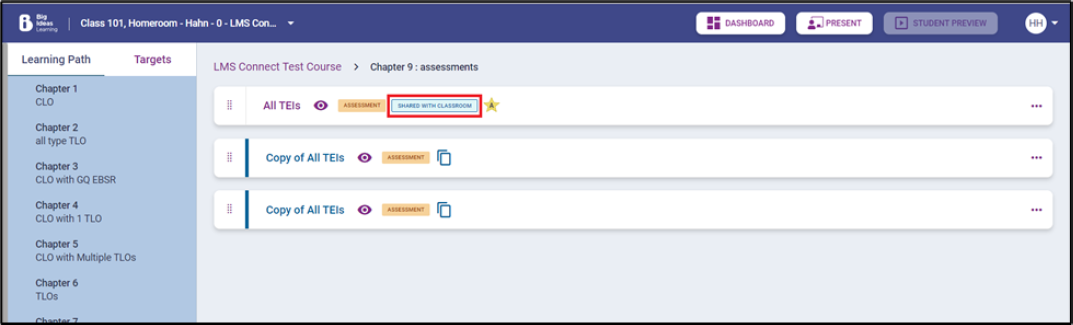
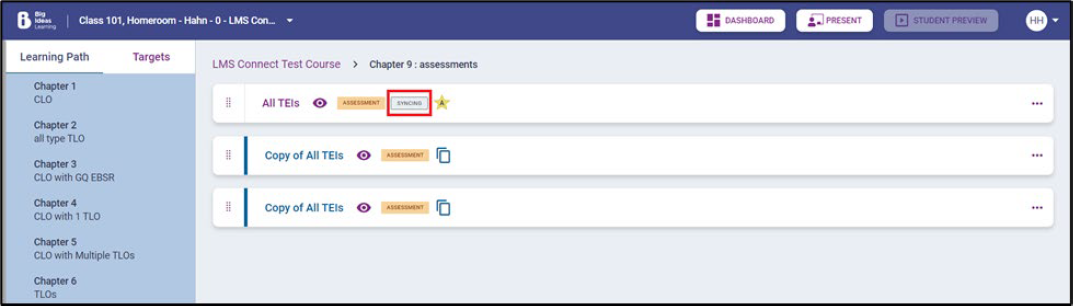
When the assessment is synced, a status label SYNCING will be
visible to the Teacher on both the assignment listing page and in Plan mode. On
success, the status label message will change to SHARED WITH
CLASSROOM and the assignment will be available on Google Classroom.
-
If the sync fails, then a NOT SYNCED label appears. Teacher can
try to sync the assignment again by selecting the 3 dots menu icon.
-
View the assignment on Google Classroom.