Visible Body Courseware integrates with Canvas for a seamless teaching and learning experience. Once integrated, Courseware content appears within Canvas for easier access and course management. This integration is available for both site license and student purchase (including bulk codes) customers. To get started, follow the steps below. You'll need an administrator to access both Canvas and Courseware to complete the setup.
Legacy LTI 1.1 is still supported. Schools already integrated with this version can refer to the information below to make new courses.
If, at any point, you need assistance during this setup, contact us at implementation@visiblebody.com or send us a support ticket.
LTI 1.3 Administrator Setup
In order to successfully complete the Visible Body (LTI 1.3) setup within Canvas, you will need the help of a Visible Body Courseware administrator as well as a Canvas LMS administrator. They can be the same person. If you don’t have a Courseware administrator account associated with your institution’s Visible Body account, please request one.
Part 1: Register Visible Body (LTI 1.3) as a Tool in Canvas
- Sign up for a Visible Body admin account if you do not already have one. Reach out to implementation@visiblebody.com to be provided a setup link.
- In Visible Body Courseware, go to the LMS Integration page on the left-hand side. Open the Canvas 1.3 tab and copy the URL to paste later.
-
In Canvas, navigate to the administrator panel on the left hand navigation. Select your institution.
-
On the left hand menu, click Developer Keys.
-
On the Developer Keys page, click + Developer Key and select + LTI Registration in the dropdown that appears.
-
Paste the dynamic URL you copied from the LMS integration page in Courseware and click continue.
-
On the Register App popup you can review your placements, and (optionally) rename them.
-
Please keep the default permissions for Visible Body to work properly with your institution.
-
All placements can be enabled without issue; you can hide one or more later, depending on how you structure your Canvas courses.
-
-
When done in the Register App popup, click Enable & Close.
-
You will be returned to the Developer Keys page to finish the integration.
-
Find the Details column by Visible Body (LTI 1.3). Highlight and copy the Client ID number directly above the Show Key button.
-
While still in the admin panel, navigate to Settings in the left hand menu, and click the Apps tab. Then click View App Configurations on the top right.
-
On the External Apps page, click + App.
-
Under Configuration Type, choose By Client ID. Paste the Client ID into the field, and click Submit. Canvas will ask you to confirm. Click Install. If you’ve previously used Visible Body, Canvas may warn that you’ve already installed the tool. In that case, click Yes, Install Tool.
- If you’re migrating your 1.1 integration, you may be asked to confirm you want to install the tool again. Select Yes.
You are now ready to manage the placement of Visible Body (LTI 1.3)
Part 2: Manage Placement and Confirm Setup
We recommend adding our Course Home to your Canvas course left hand navigation. This allows Visible Body to be easily accessible in relevant courses.
- Navigate to a course where you would like to add Visible Body (LTI 1.3). You must be logged in as an admin.
- On the left hand menu, click Settings. On the top menu, click Navigation. Drag Visible Body (LTI 1.3) to appear where you want in the course navigation.
- Click Save.
- Visible Body (LTI 1.3) should now be in your course navbar. Click to access the Visible Body 1.3 Homepage.
- You will be asked to confirm that you have set up this integration.
Select Connect and check for a notice confirming that you have
successfully connected your institution with Visible Body. There will be
one more step before you are finished.
- If you do not see this prompt, try refreshing the page and clicking the Visible Body tool again.
You will need to link a course to complete this integration. If you don’t have one, you can choose a sample course or create a new course from the course linking page.
- Select Manage Sync Options from the Course Home, or select the
settings icon within the Assignment Library to link a course. Once any
course has been linked, this integration is ready to go. Note, your
instructors will link their own courses.
- You can verify your connection by going into the Courseware LMS Integration page and checking the 1.3 Canvas tab for Connected.
Important: Once the integration is set up, any student added to the Canvas Course will have access to Visible Body. Once they click a Courseware link, they will either be counted as part of the site license arrangement (if the integration is set up as a site license) or start the purchase process.
Instructor Setup
This section of the article assumes your administrator has already registered and managed the placement of Visible Body (LTI 1.3) in Canvas. If they have not, they will need to follow the instructions for administrator setup.
These steps are for instructors who want to use Visible Body with their Canvas course. When students are added to your Canvas course, they will be automatically added to Visible Body after the student selects a link or accesses an assignment. With this setup, you will also be able to more easily deep-link to your assignments.
When you link one or more Visible Body assignments, one column in your Canvas gradebook will be added for each link. Scores from your students will automatically update in the gradebook as your students work on those activities. You can edit the activity points as you add the links, or you can set activities not to count toward your grades. You can edit any Visible Body scores in the Canvas gradebook, but the results shown in Courseware will not reflect those edits until you change them there, too.
Follow along with the steps below to access your Canvas Courseware integration.
Log into Courseware and Link Your Courses
Visible Body (LTI 1.3) should be available in your course’s left hand navigation already. Your administrator may have named this tool something else. We recommend that your admin add our Course Home to all courses using Visible Body. This makes it easier to manage course content and gives students and instructors one-click access to the full Visible Body Suite app.
However, if they have not installed Courseware Home you can still manage your courses in the Assignment Library.
- Select Visible Body (LTI 1.3) and sign in using your Visible Body email and password. You’ll only have to do this once in Canvas.
- Select the Visible Body course you want to associate with your Canvas course. If you don’t have one set up yet, you can create one at this stage.
- Click Link Course and confirm.
- Your course is now linked. From the Visible Body (LTI 1.3) homepage, selecting Go to Courseware will take you or your students to the associated course in Courseware.
Add Course Home
Course Home is a recommended extra placement that gives your students easy access to the Courseware website and our Visible Body Suite web app. If your admin hasn’t already added Course Home to your Visible Body courses, you can add Course Home to your course content directly from our assignment library! Open the library, check Add Link to Course Home, and select Link Visible Body Home to complete the process.
Link an Assignment
The Visible Body Assignment Library displays all published assignments within your linked course. Click on any assignment to open it and view its activities, you'll see a toggle next to each activity that allows you to mark it as graded or ungraded - this will determine whether or not the assignment populates your LMS gradebook. Select the checkbox next to the assignment to link it to your course.
To make edits or publish new assignments, simply click Manage Assignments, and you will be taken directly to your linked Courseware course.
To update your linked course, click the settings cog in the upper right corner.
To add within your Modules:
- Navigate to Modules and select the ellipsis “...” next to the module name you want to add the assignments into.
- Find Visible Body’s 1.3 assignment library and select it. If you haven’t signed in and linked to your Visible Body course you will now be prompted to do so. See here for more information on that step.
- Check off the assignments and activities you want to link and populate in the gradebook.
- Select Link Assignment and a deep link to your assignment will appear within that module! These assignments will be automatically added to your Canvas gradebook.
To add with assignments:
Option 1
- Navigate to Assignments and select the ellipsis "..."
- Find Visible Body’s 1.3 assignment library and select it. If you haven’t signed in and linked your Visible Body course, you will now be prompted to do so. See here for more information on that step.
- Check off the assignments and activities you want to link.
- Select Link Assignment and a deep link to your assignment will appear in your course! These assignments will be automatically added to your gradebook.
Option 2
- Navigate to Assignments and select +Assignment
- Under Submission Type select External Tool from the dropdown
- Click Find
- Find Visible Body’s 1.3 assignment library and select it. If you haven’t signed in and linked your Visible Body course you will now be prompted to do so. See here for more information on that step.
- Check off the assignments and activities you want to link.
- Select Link Assignment and a deep link to your assignment will appear in your course! These assignments will be automatically added to your gradebook.
Course Management
Adding and Transferring Students and Instructors
To ensure students or co-instructors can access the Visible Body materials in your course, simply add them to your Canvas course or section. You no longer need to use the Invite People feature in the Courseware platform to do this. Once you or your administrator has added any student to your course in Canvas, and they can see the Visible Body (LTI 1.3) homepage, they’re ready for immediate access!
Transfer students to the correct course in Courseware first, then transfer them to the corresponding course in Canvas and they will still have automatic access.
If you transfer your students in the LMS before doing so in Courseware, they will need to be dropped from the initial course in Courseware to ensure they’re only in the course you intend.
Unlink Your Courseware and Canvas Courses
If you've accidentally linked the wrong Courseware course to your Canvas course, you can follow these steps to unlink your courses.
- Navigate to your Visible Body (LTI 1.3) homepage and select Manage Sync Options. Alternatively, navigate to the Visible Body (LTI 1.3) assignment library and click the settings icon.
- On this subpage, find the course that is currently connected, select Unlink Course, and click Yes.
Note: Once you unlink your original course, your students will not be able to use the Courseware LTI or links. Now that your Canvas and Courseware courses are unlinked, you may connect a new Courseware course to your Canvas course by selecting the “Connect Course” option that will appear on “Manage Sync Options” after unlinking a course is complete. Selecting this option will bring you back to the course connection process. You can also now link the Courseware course to another Canvas course.
Student Help
You can share this LMS student help article with your students for extra help accessing their Visible Body material in your LMS.
Common Setup Questions
- As an admin, why am I not being prompted to accept the integration? Does
that mean I’m done?
You need to accept by confirming the integration and linking a course, Visible Body (LTI 1.3) will not be connected until you finish this process. Check that you are logged into Canvas with an admin account and that you are not impersonating a teacher or student.
- My LMS integration page says connected, so why do my teachers see an error
that the admin has not completed the integration?
Check that the course is in the same sub-account. If all courses are considered their own sub-account or the LTI is added to each course separately, the admin may need to accept the integration for each course.
- Why do I not see the LTI 1.3 tab in the Courseware LMS Integration page?
Email your Visible Body sales representative or implementation@visiblebody.com
- How can I fix my students seeing third party cookie errors?
Check out our full LTI 1.3 integration FAQ for more information. If you have further questions, contact us at implementation@visiblebody.com or send us a support ticket.
LTI 1.1 Older Integration Setup
Get a secret and key
Before you start the integration process you need a Courseware "secret and key" for Canvas from the Visible Body Team. If you don’t have a secret and key from a Visible Body representative, please request one.
Set up Single Sign on Lite integration
Once you have your secret and key, you are ready to start the integration process by following the steps below. You can also schedule a call with Visible Body to help you set up your integration.
-
Set up Courseware as an external tool in Canvas. Simply add Courseware as an app using the Canvas App Center and the secret and key provided with your school's Visible Body Courseware group subscription.
-
Log into Canvas.
-
Go to Settings.
-
Select the Apps tab.
-
Next, check the list of apps for the Visible Body icon and then select it. (If you are missing this icon, please submit a support ticket
-
Finally, enter your secret and key.
-
-
Select the Canvas course you want to integrate with your Courseware course.
-
To make Courseware available on the left-hand bar in Canvas, you will need to make it visible. (By default, Courseware will be hidden.)
-
In the Settings menu, go to Navigation
-
You’ll see Visible Body Courseware in a list under items that are hidden from students. Drag it up and drop it to the place you want it to show on the left-hand bar (course navigation section).
-
Select “Save”
-
Refresh your view, and Courseware will show on the left-hand bar.
-
Link a Courseware course to a Canvas course
For students to access your course, you will need to link the Canvas course to the Courseware course you wish to use.
- Select Visible Body Courseware from the left-Nav menu and sign in to link your Canvas and Courseware accounts. You won't be asked to log into Courseware again when accessing through Canvas, just log into Canvas!
- Next, you'll be prompted to link aCourseware course to your Canvas
course. Just select your course from the dropdown, or if you want to
create a new course, select "Create one" below.
Look for the green confirmation message at the top of the screen to make sure your course has been linked successfully.
- Each time you visit Courseware through Canvas, it will bring you directly to the linked Courseware course.
If you’ve linked the incorrect course and need to unlink your Courseware and Canvas courses, follow the instructions in the "Unlink a Courseware Course" section below.
Some items to note:
- Import Courseware grades into Canvas more effectively with the CSV export function in the gradebook. Now, you can use the populated SIS User ID column to match up students before you import the grades.
- Canvas Courseware integration is available for schools that have a group license and for courses in which students purchase their own subscription.
- You only need one secret and key for each instance of Canvas. Most instructors at one campus can use the same secret and key to set up their courses. If your school has multiple campuses using different instances of Canvas, you will need a secret and key for each.
- DO NOT use the "Invite People" link to invite students to your course. This feature does not work with the Canvas-Courseware integration. - This really only affects deep integration users.
Troubleshooting for Safari users
If you are using Safari and see an error message, follow these steps:
- Select "Safari" from the top menu bar.
- In the dropdown, select "Preferences".
- In the settings window, select "Privacy" from the top bar.
- Uncheck the box for "Prevent cross-site tracking"
- Try linking your Courseware course to your Canvas course again.
- If you still see an error message, please contact our support team.
Student Sign On
Once your integration is set up, it is easy for students to access Courseware within Canvas. This article includes step by step instructions.
Set up Canvas Deep integration
The instructions below are for customers who want a Deep Integration between Canvas and Courseware for their courses. In addition to single sign-on functionality, Deep integration will automatically sync selected assignments and grades with your Canvas gradebook.
To complete the Deep integration, the person following these steps at your school will need administrator access to the school's Canvas instance.
Step 1: Generate a developer key
Once you have set up Lite integration, administrators will need to generate a Developer Key using information from Visible Body and from your institution.
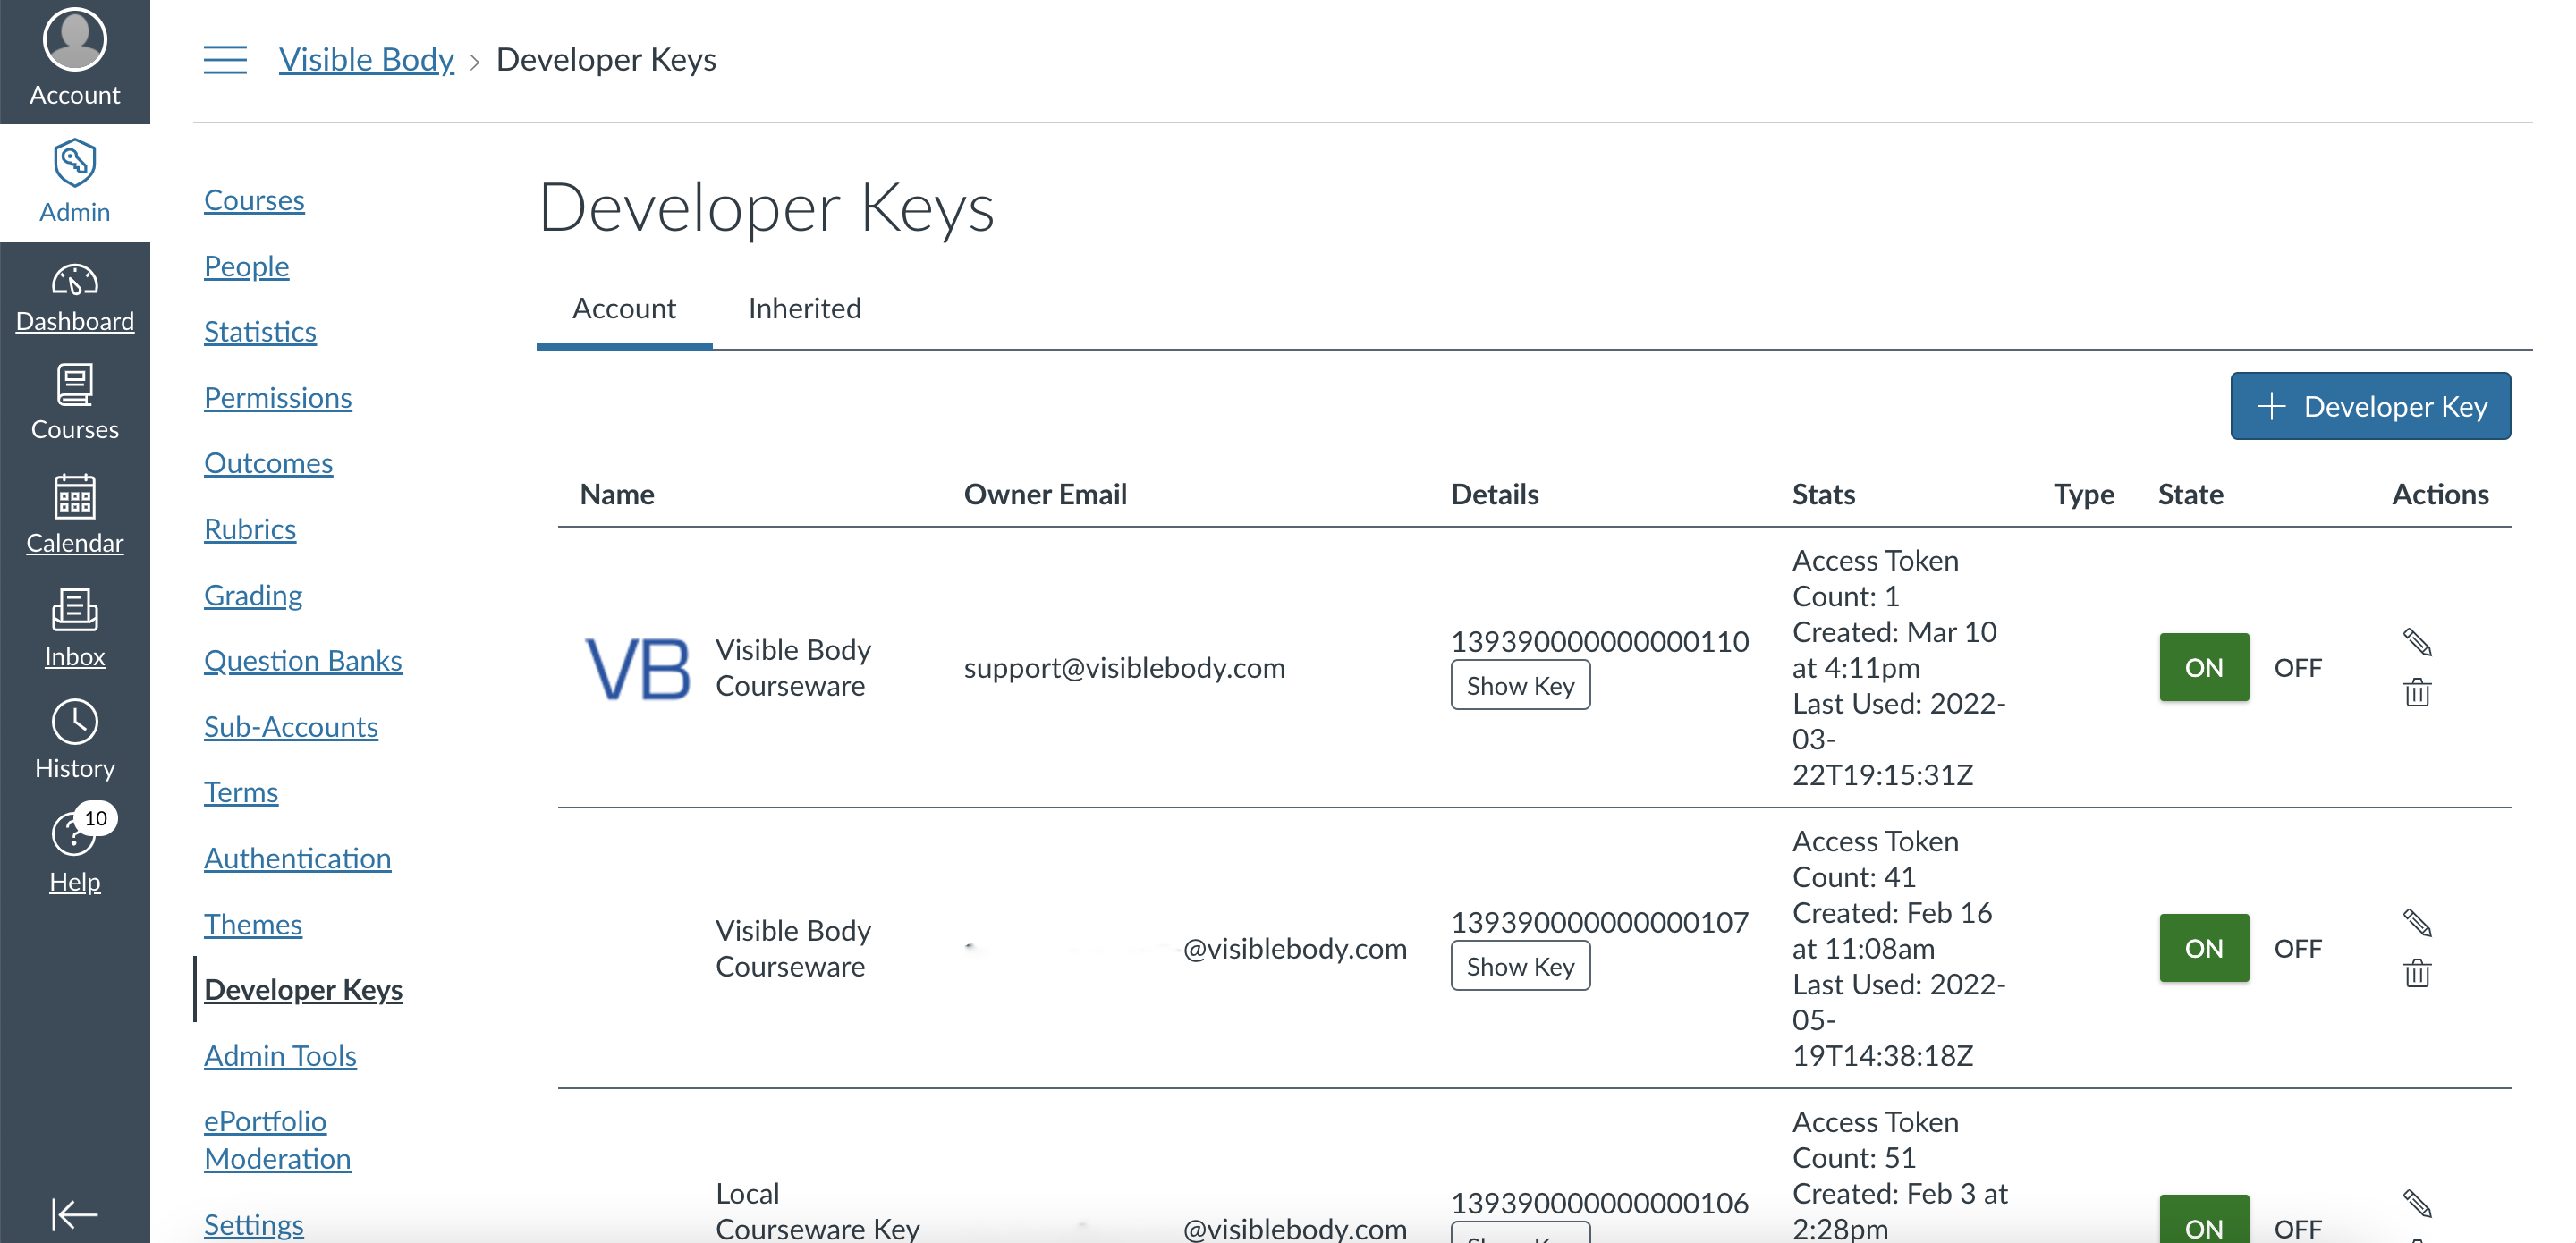
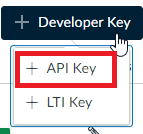
- In Canvas, navigate to the left-hand panel, select "Admin", select
"Choose the Account", then "Developer Key". Select "API" Key.
- Administrators will need to know the following information to create a
Developer Key:
- Owner Email: support@visiblebody.com
- Redirect URI: https://courseware.visiblebody.com/oauth2response
 Icon URL: https://www.visiblebody.com/hubfs/vb_favicon_64.png
- If your institution chooses to enforce Scopes, this is the list
of Scopes (API permissions) that Visible Body requires:
- "Assignments" to sync new and existing assignments in the first place
- "Assignment Groups" to handle Assignment Groups
- "Courses" to get the list of all users in a Canvas course
- "Submissions" to edit the scores of a specific assignment
- Add a Key Name: e.g. “Visible Body”. This is for your institution's use only.
-
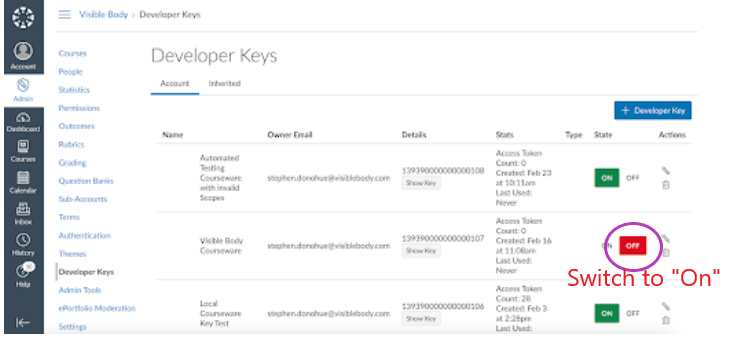
Return to the "Developer Key" page, and switch the State setting to the "On" position (pictured below):
-
The Canvas administrator will then need to send the following information to the Visible Body Implementation Team (implementation@visiblebody.com):
Developer Key ID: the ID that appears on the Developer Key screen; this is NOT the Developer Key

Developer Key: what is shown after selecting “Show Key”

- Once the Visible Body Implementation Team adds the Developer Key ID and Developer Key to our system, the account will be ready to enable Deep integration.
Step 2: Enable Canvas and Courseware Deep integration
After the developer key has been added, the administrator setup is largely complete.
Note: Visible Body will detect if there is a mismatch between the keys. In that case, the administrator may need to intervene.
Open the Canvas course and click on the Visible Body Courseware LTI. After Courseware opens, Navigate to the LMS Integration link in the Courseware menu and select "Enable Deep Integration".
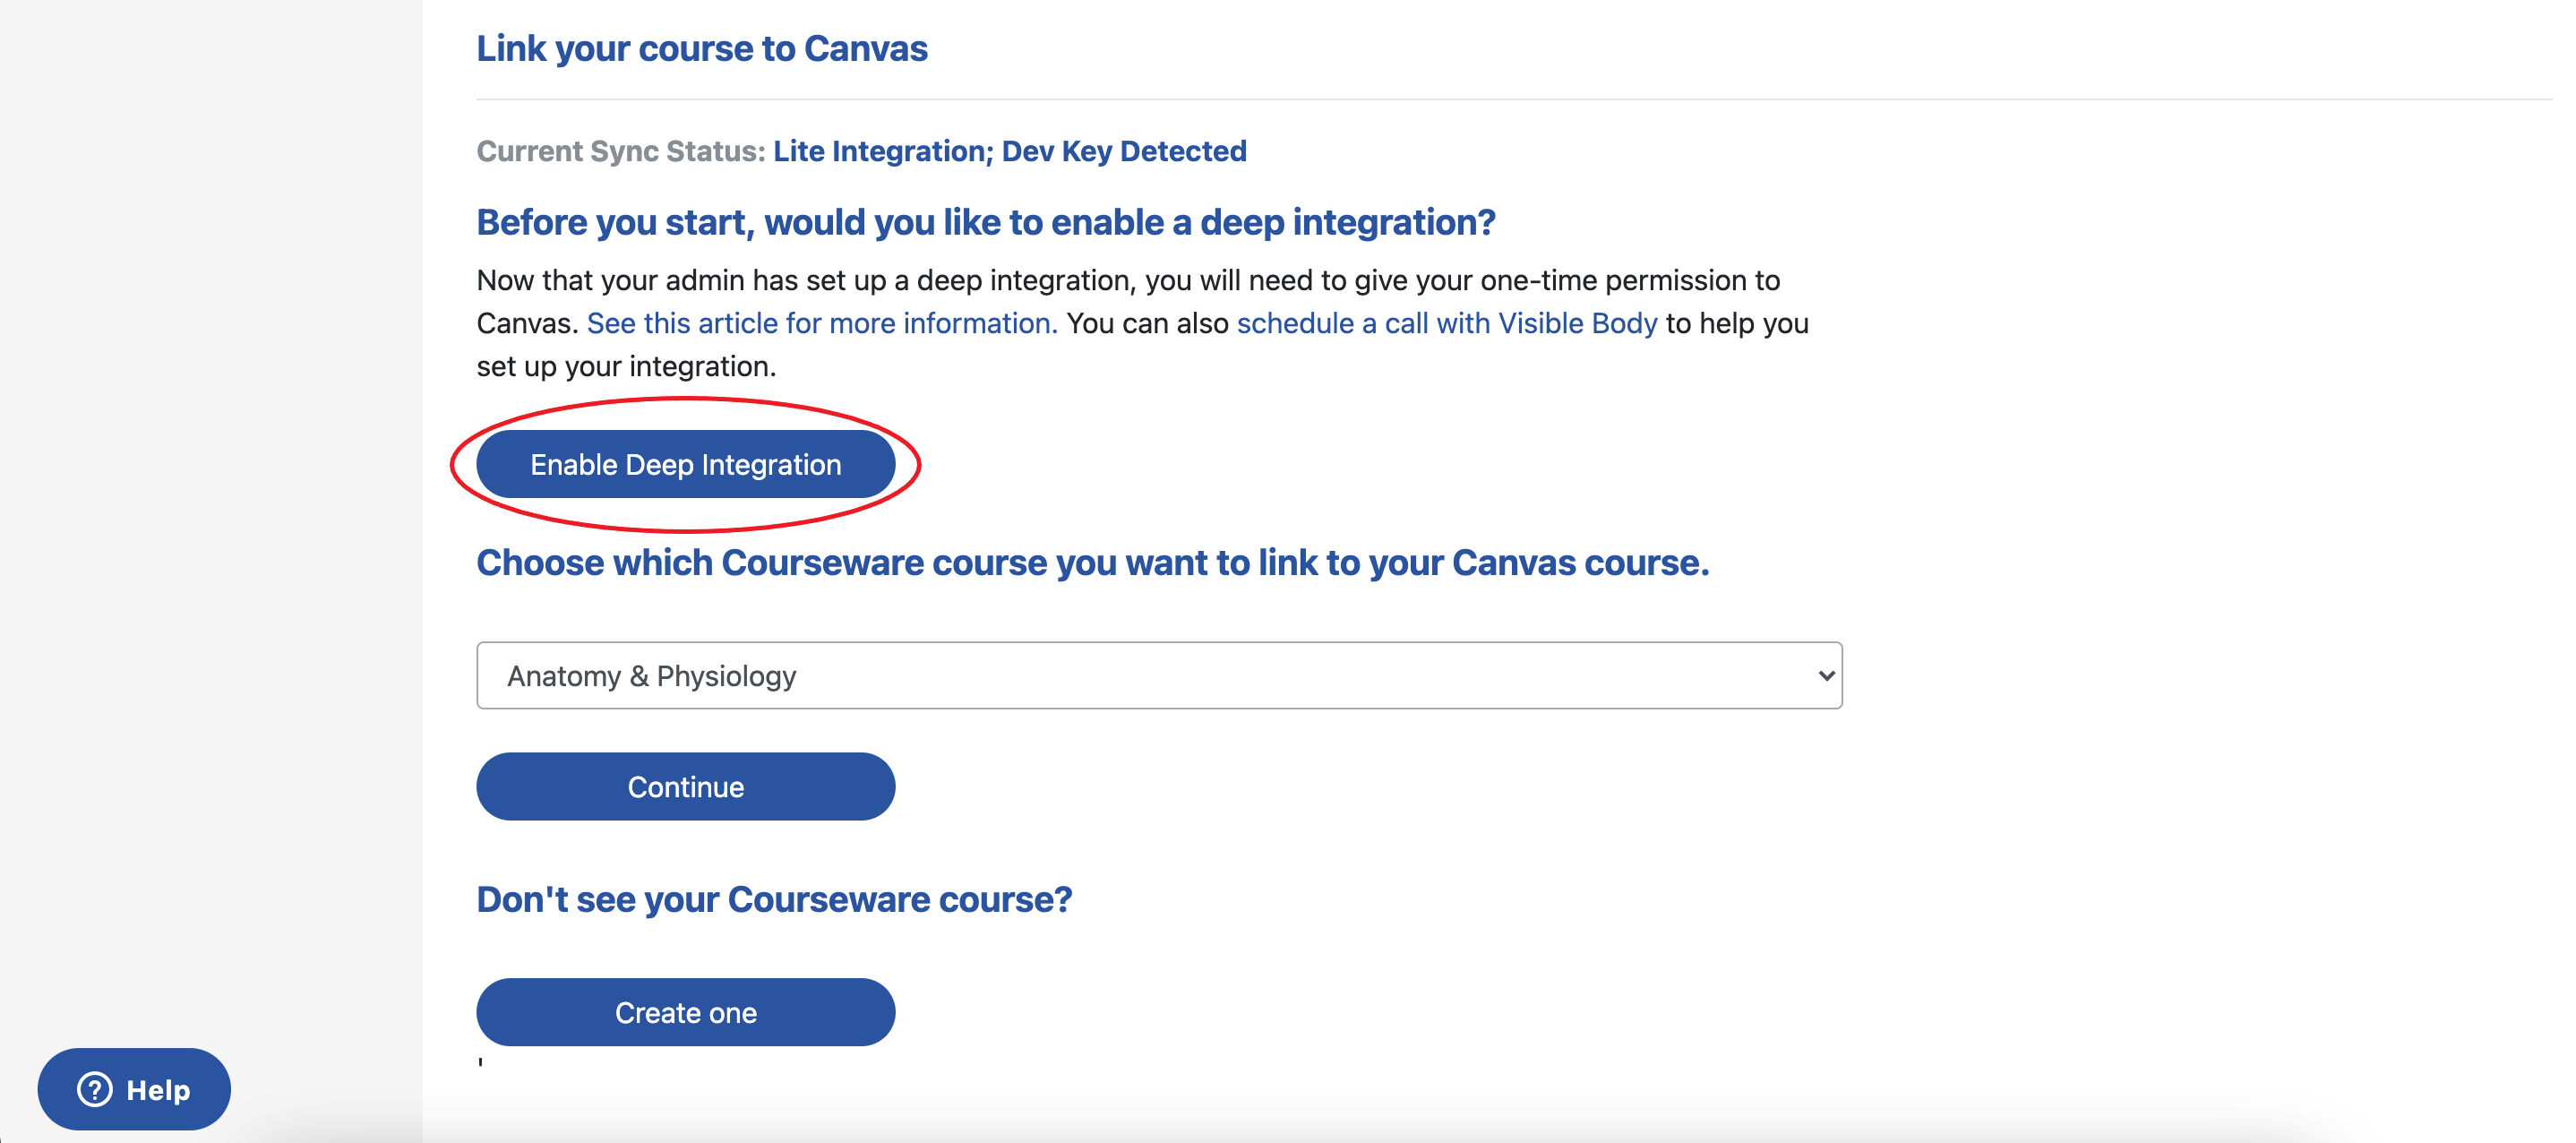
Then, authorize Courseware to access Canvas information.
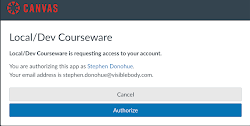
This authorization is required only once per instructor, regardless of how many Courseware courses they have.
For institutions without Canvas and Courseware Lite integration, or for new Courseware customers, selecting "Authorize" will return the administrator to the course selection page (pictured below) to continue linking an instructor's course.

If you do not see the green slide, click the Visible Body Courseware LTI again in Canvas and navigate to the LMS Integration page link in Courseware.
Step 3: Select courses and assignments
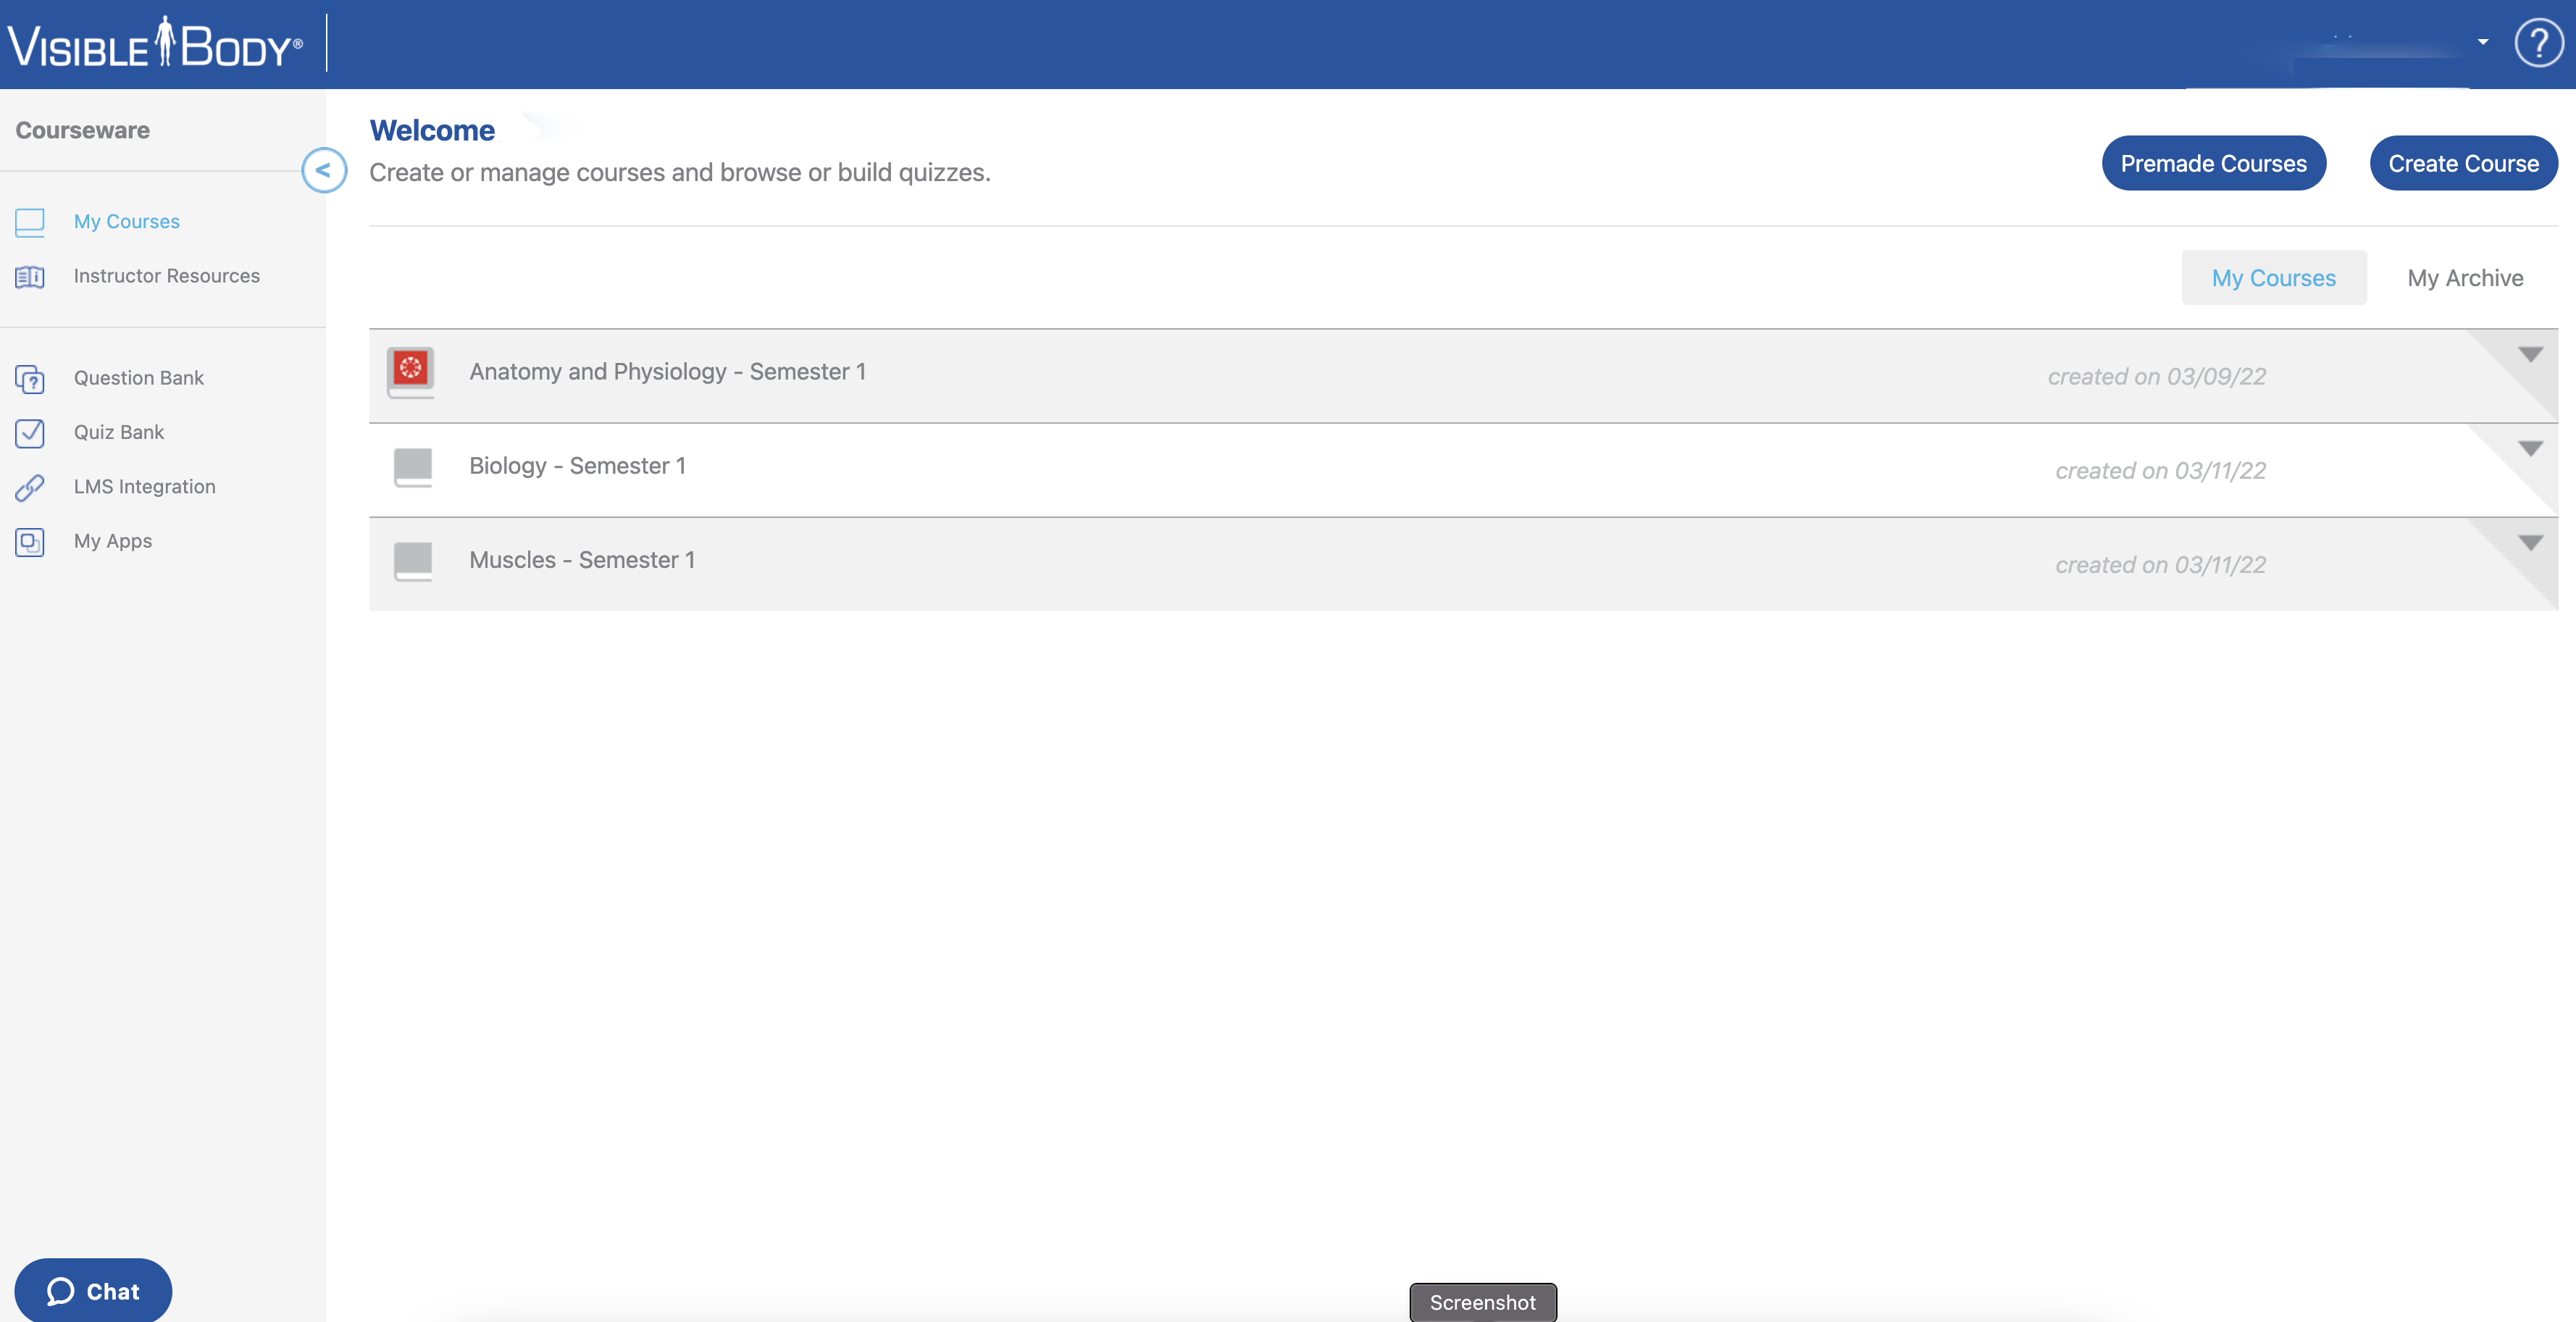
Navigate to the My Courses page, and you will see the Canvas Deep icon next to courses that are fully integrated with Canvas. It's easy to establish Canvas Deep integration for other courses in your My Courses page. Simply return to Canvas, and link your Canvas course to the appropriate Courseware course.
Within a course with Deep integration, you can also select individual assignments to deploy to Canvas. Select the "Deploy to Canvas" button under the Bulk Editing tool, then "Sync Assignments".
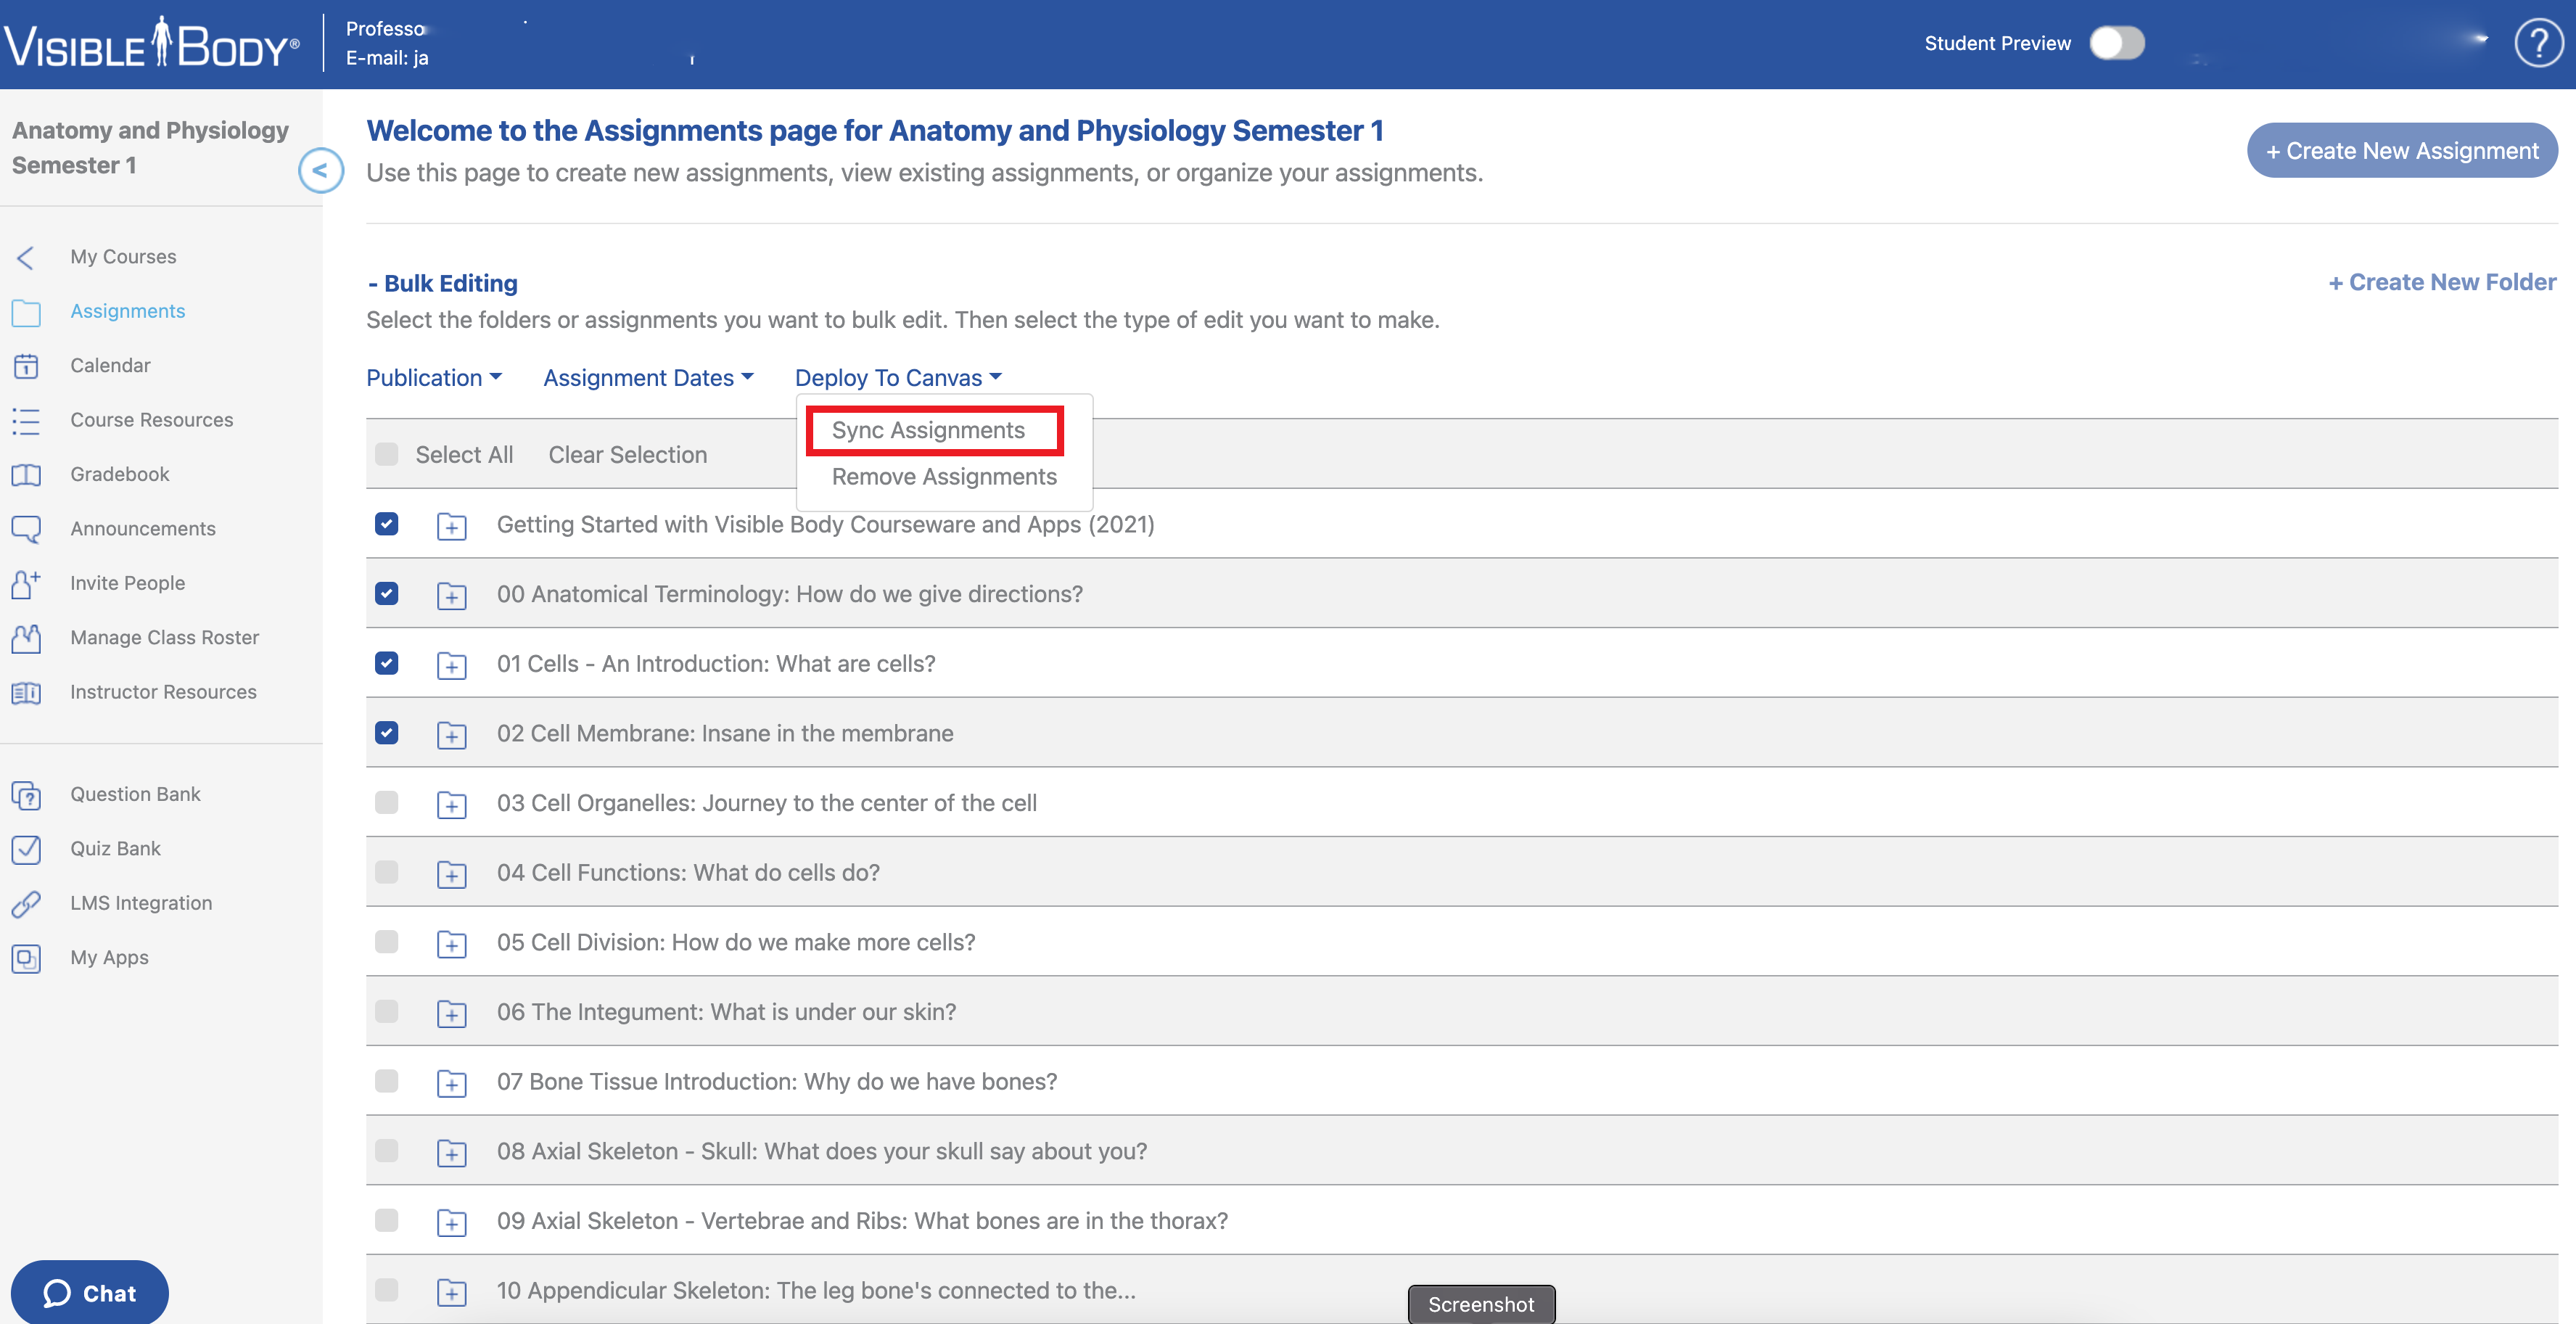
A "Sync Assignments" notification will inform you that your assignments are about to be synced between Courseware and Canvas. Note: To make these assignments visible to students in your Canvas course, be sure they are published in Courseware first.
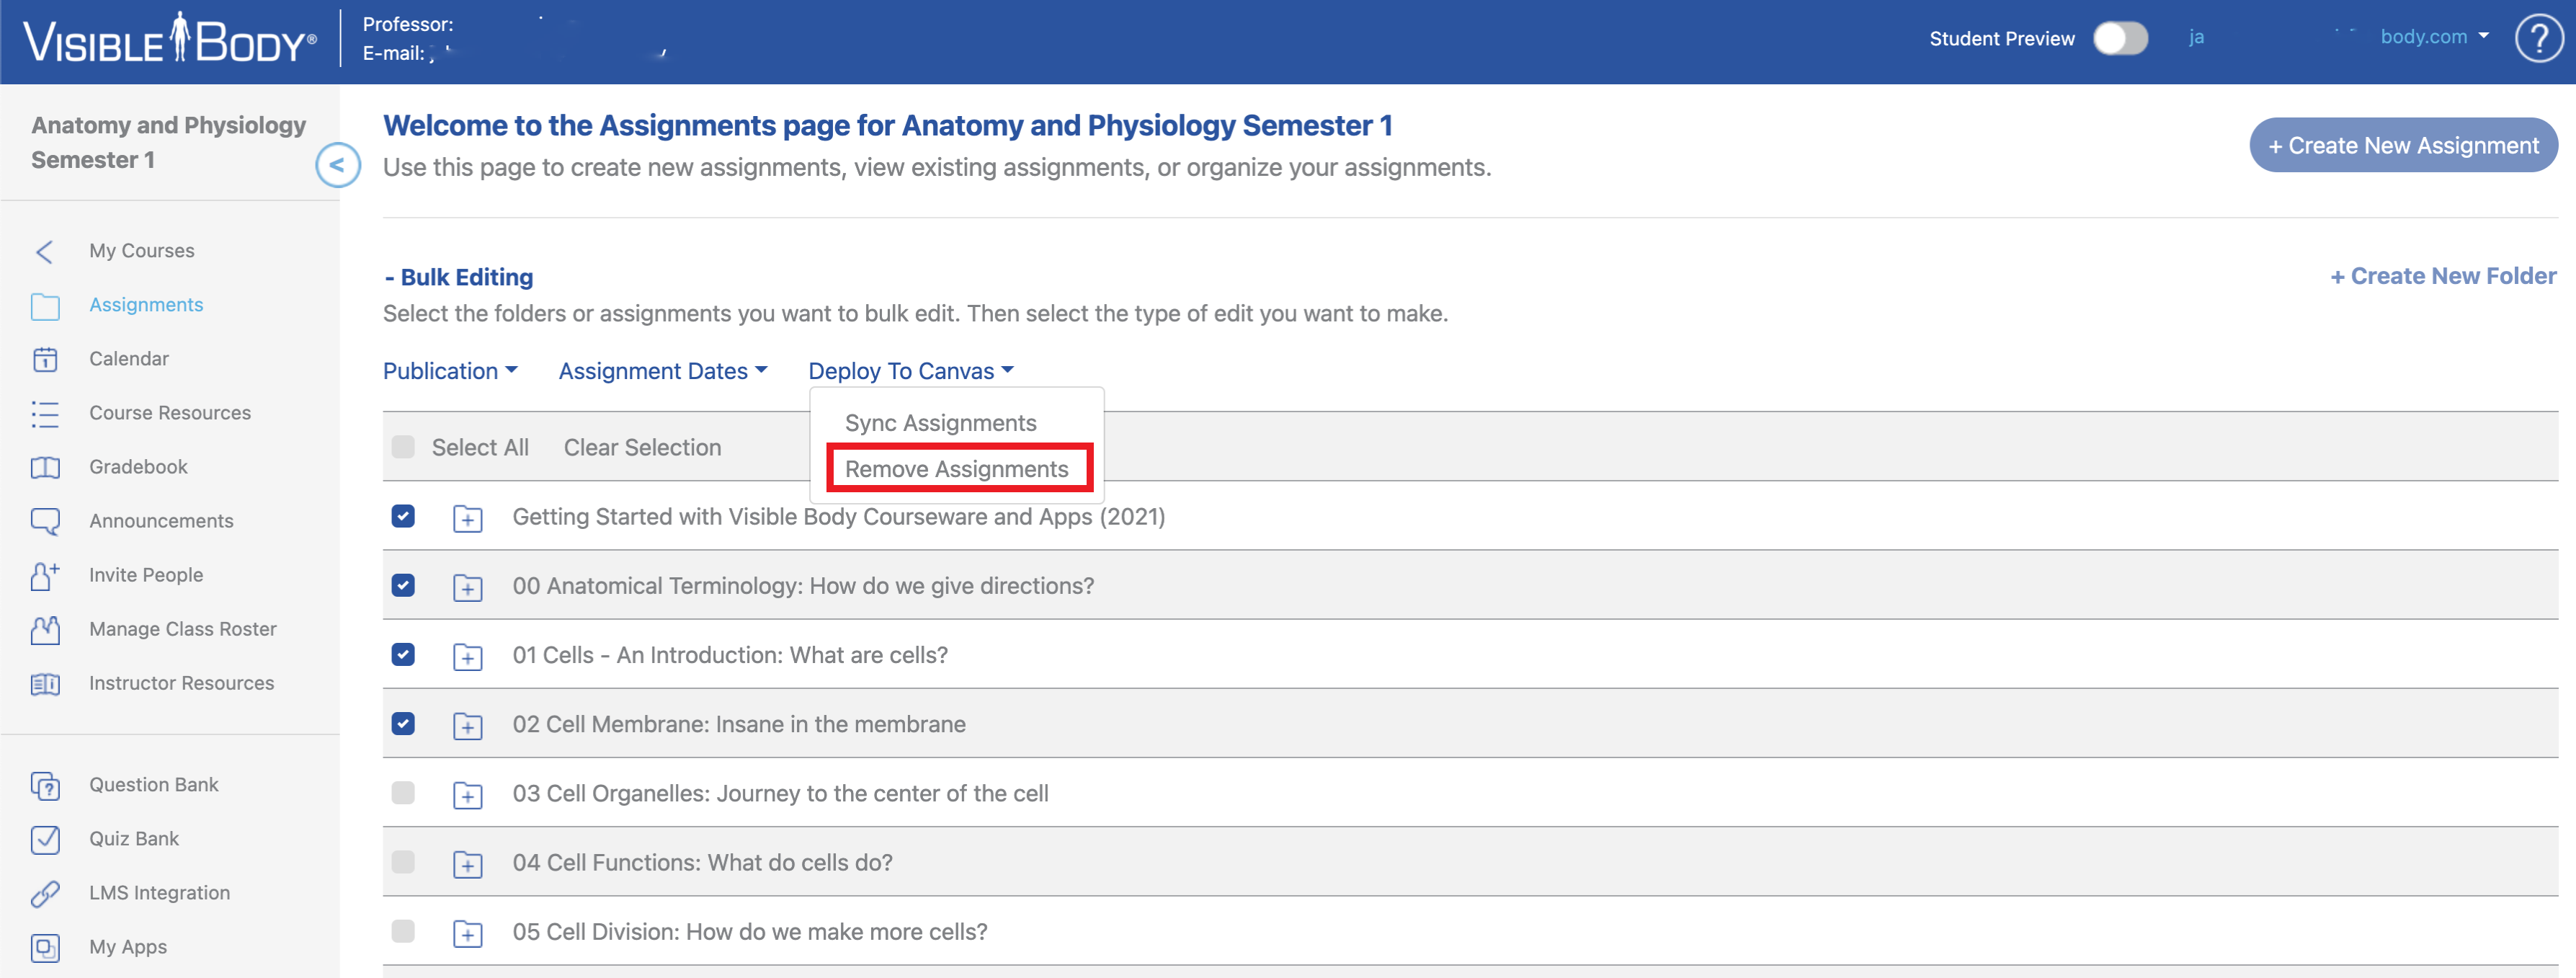
Conversely, you can remove assignments from the sync option (pictured below) by deselecting them using the Bulk Editing tool.
- Select the assignments
- Select "Deploy to Canvas"
- Select "Remove Assignments" from the dropdown menu
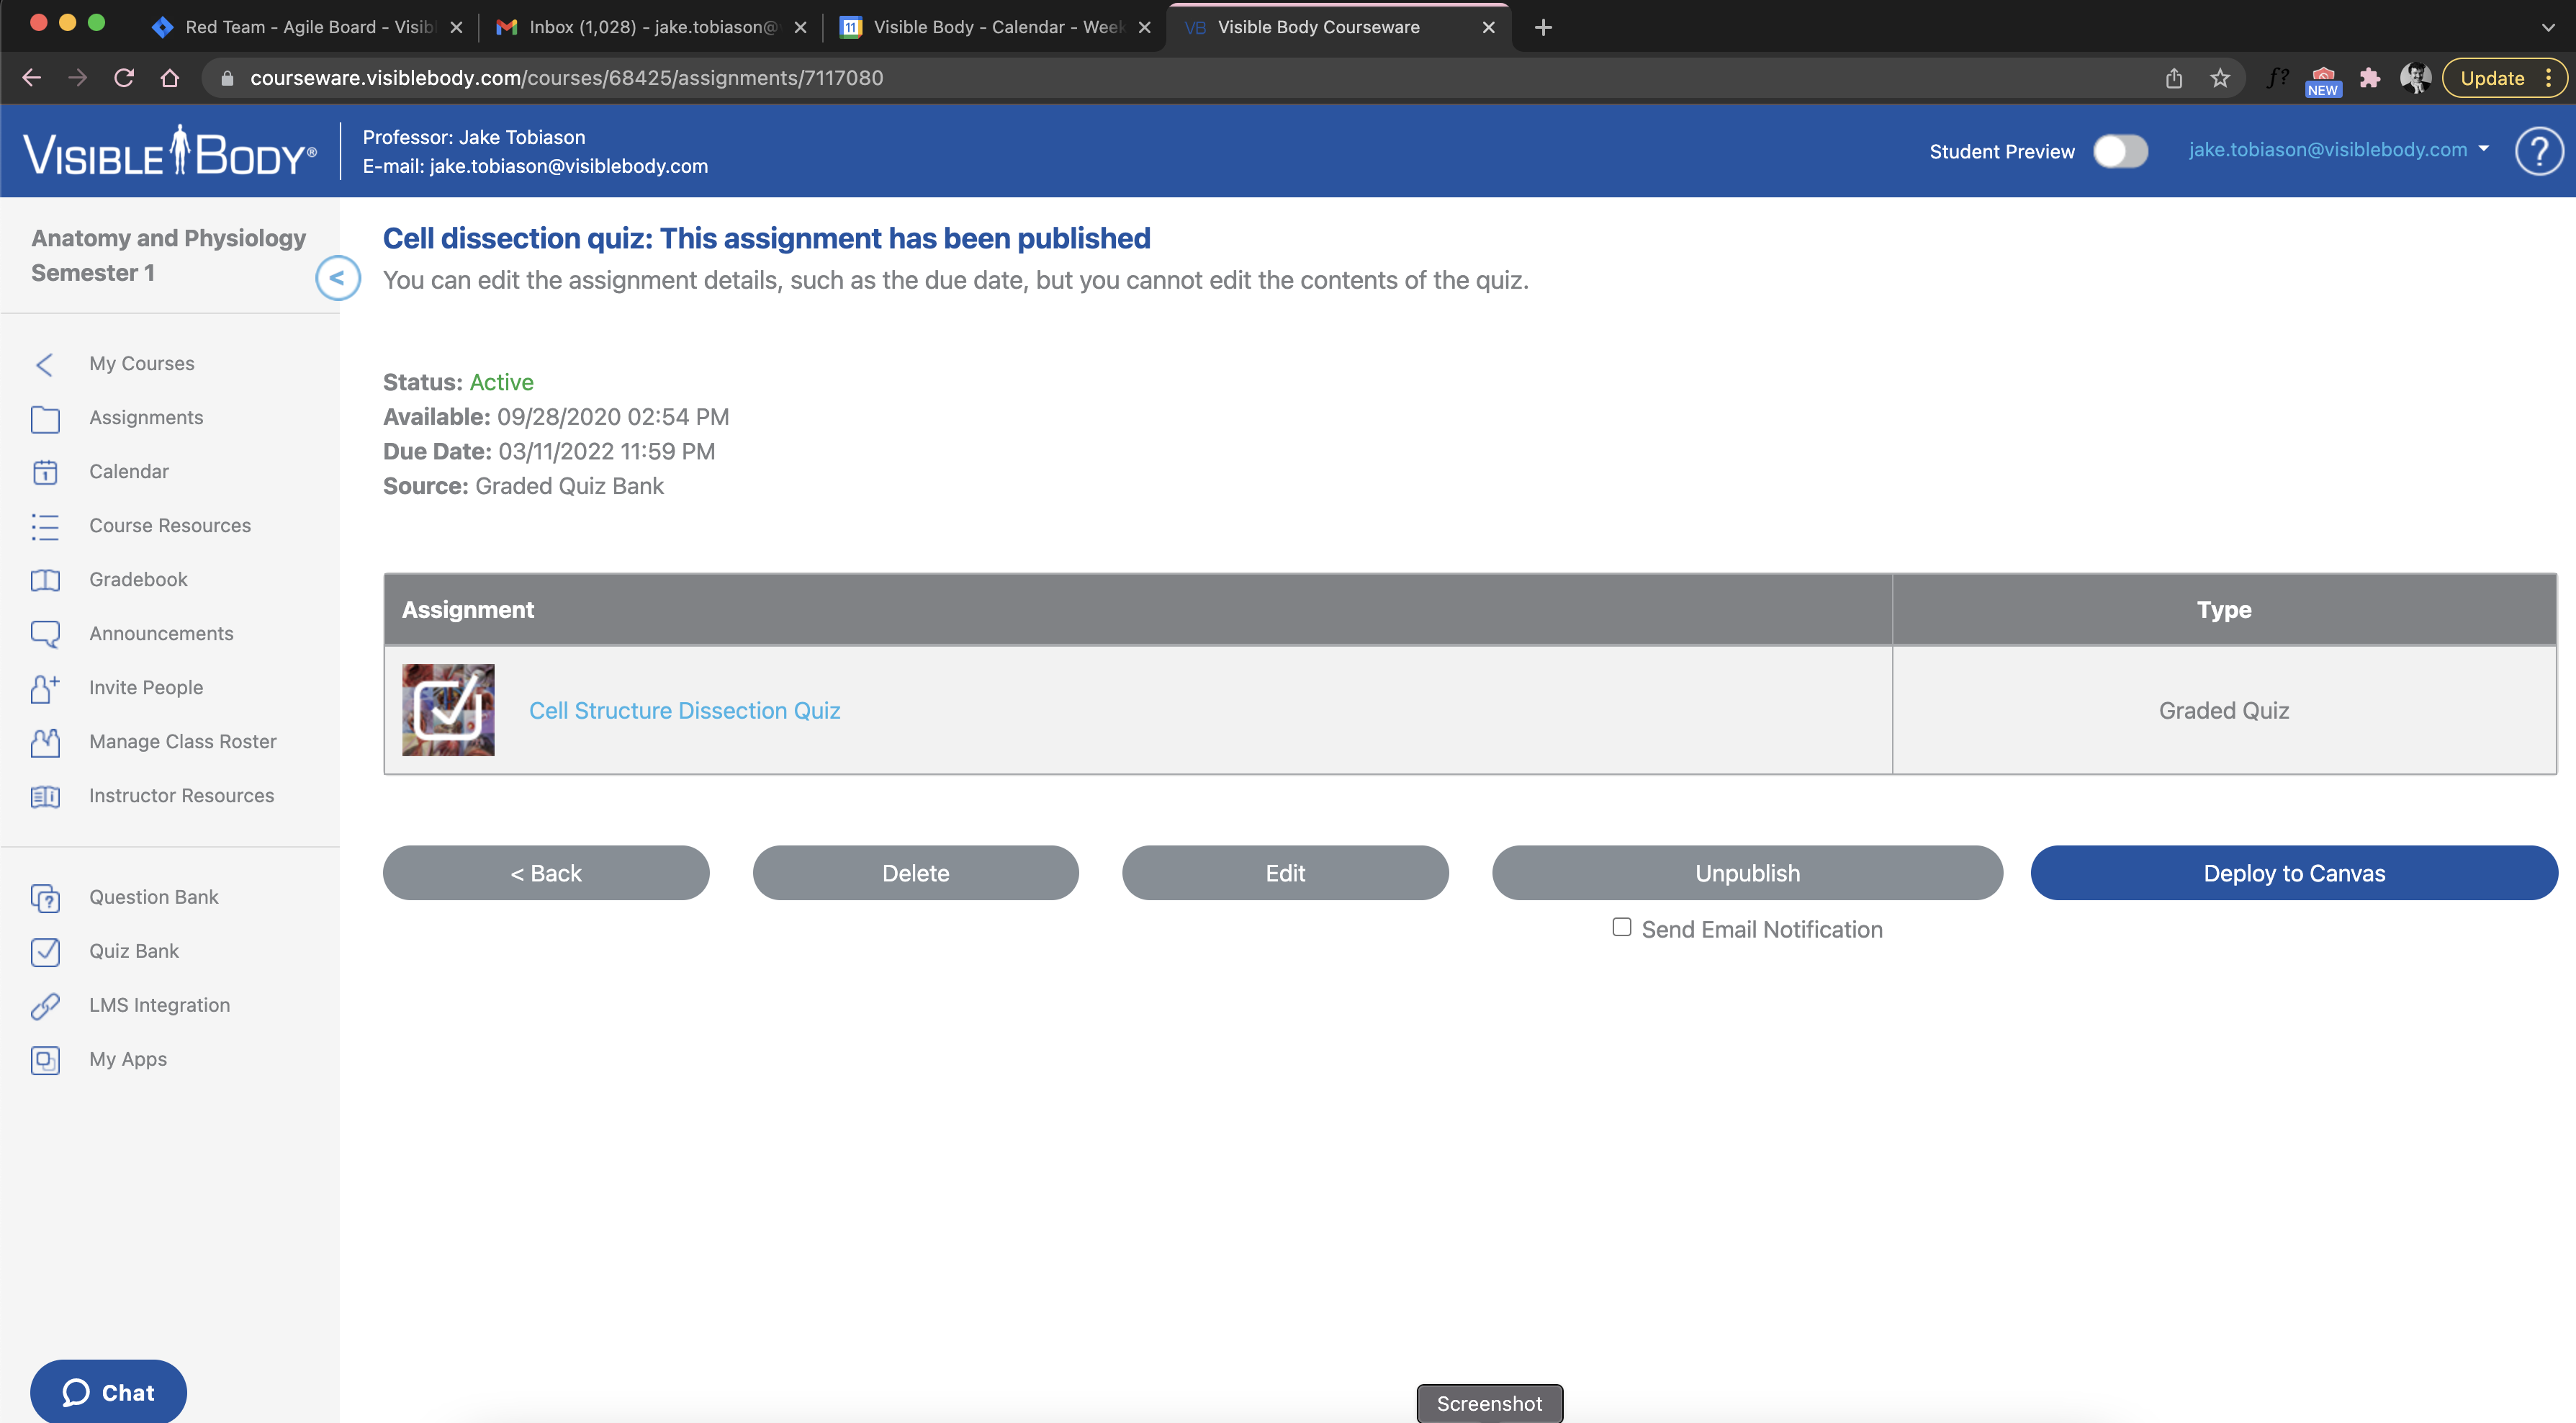
Note: You can deploy individual assignments to Canvas as well. Open the assignment, and select the "Deploy to Canvas" button in the assignment page (pictured below). To confirm that an individual assignment is no longer synced, the "Deploy to Canvas" button will read "Remove from Canvas".
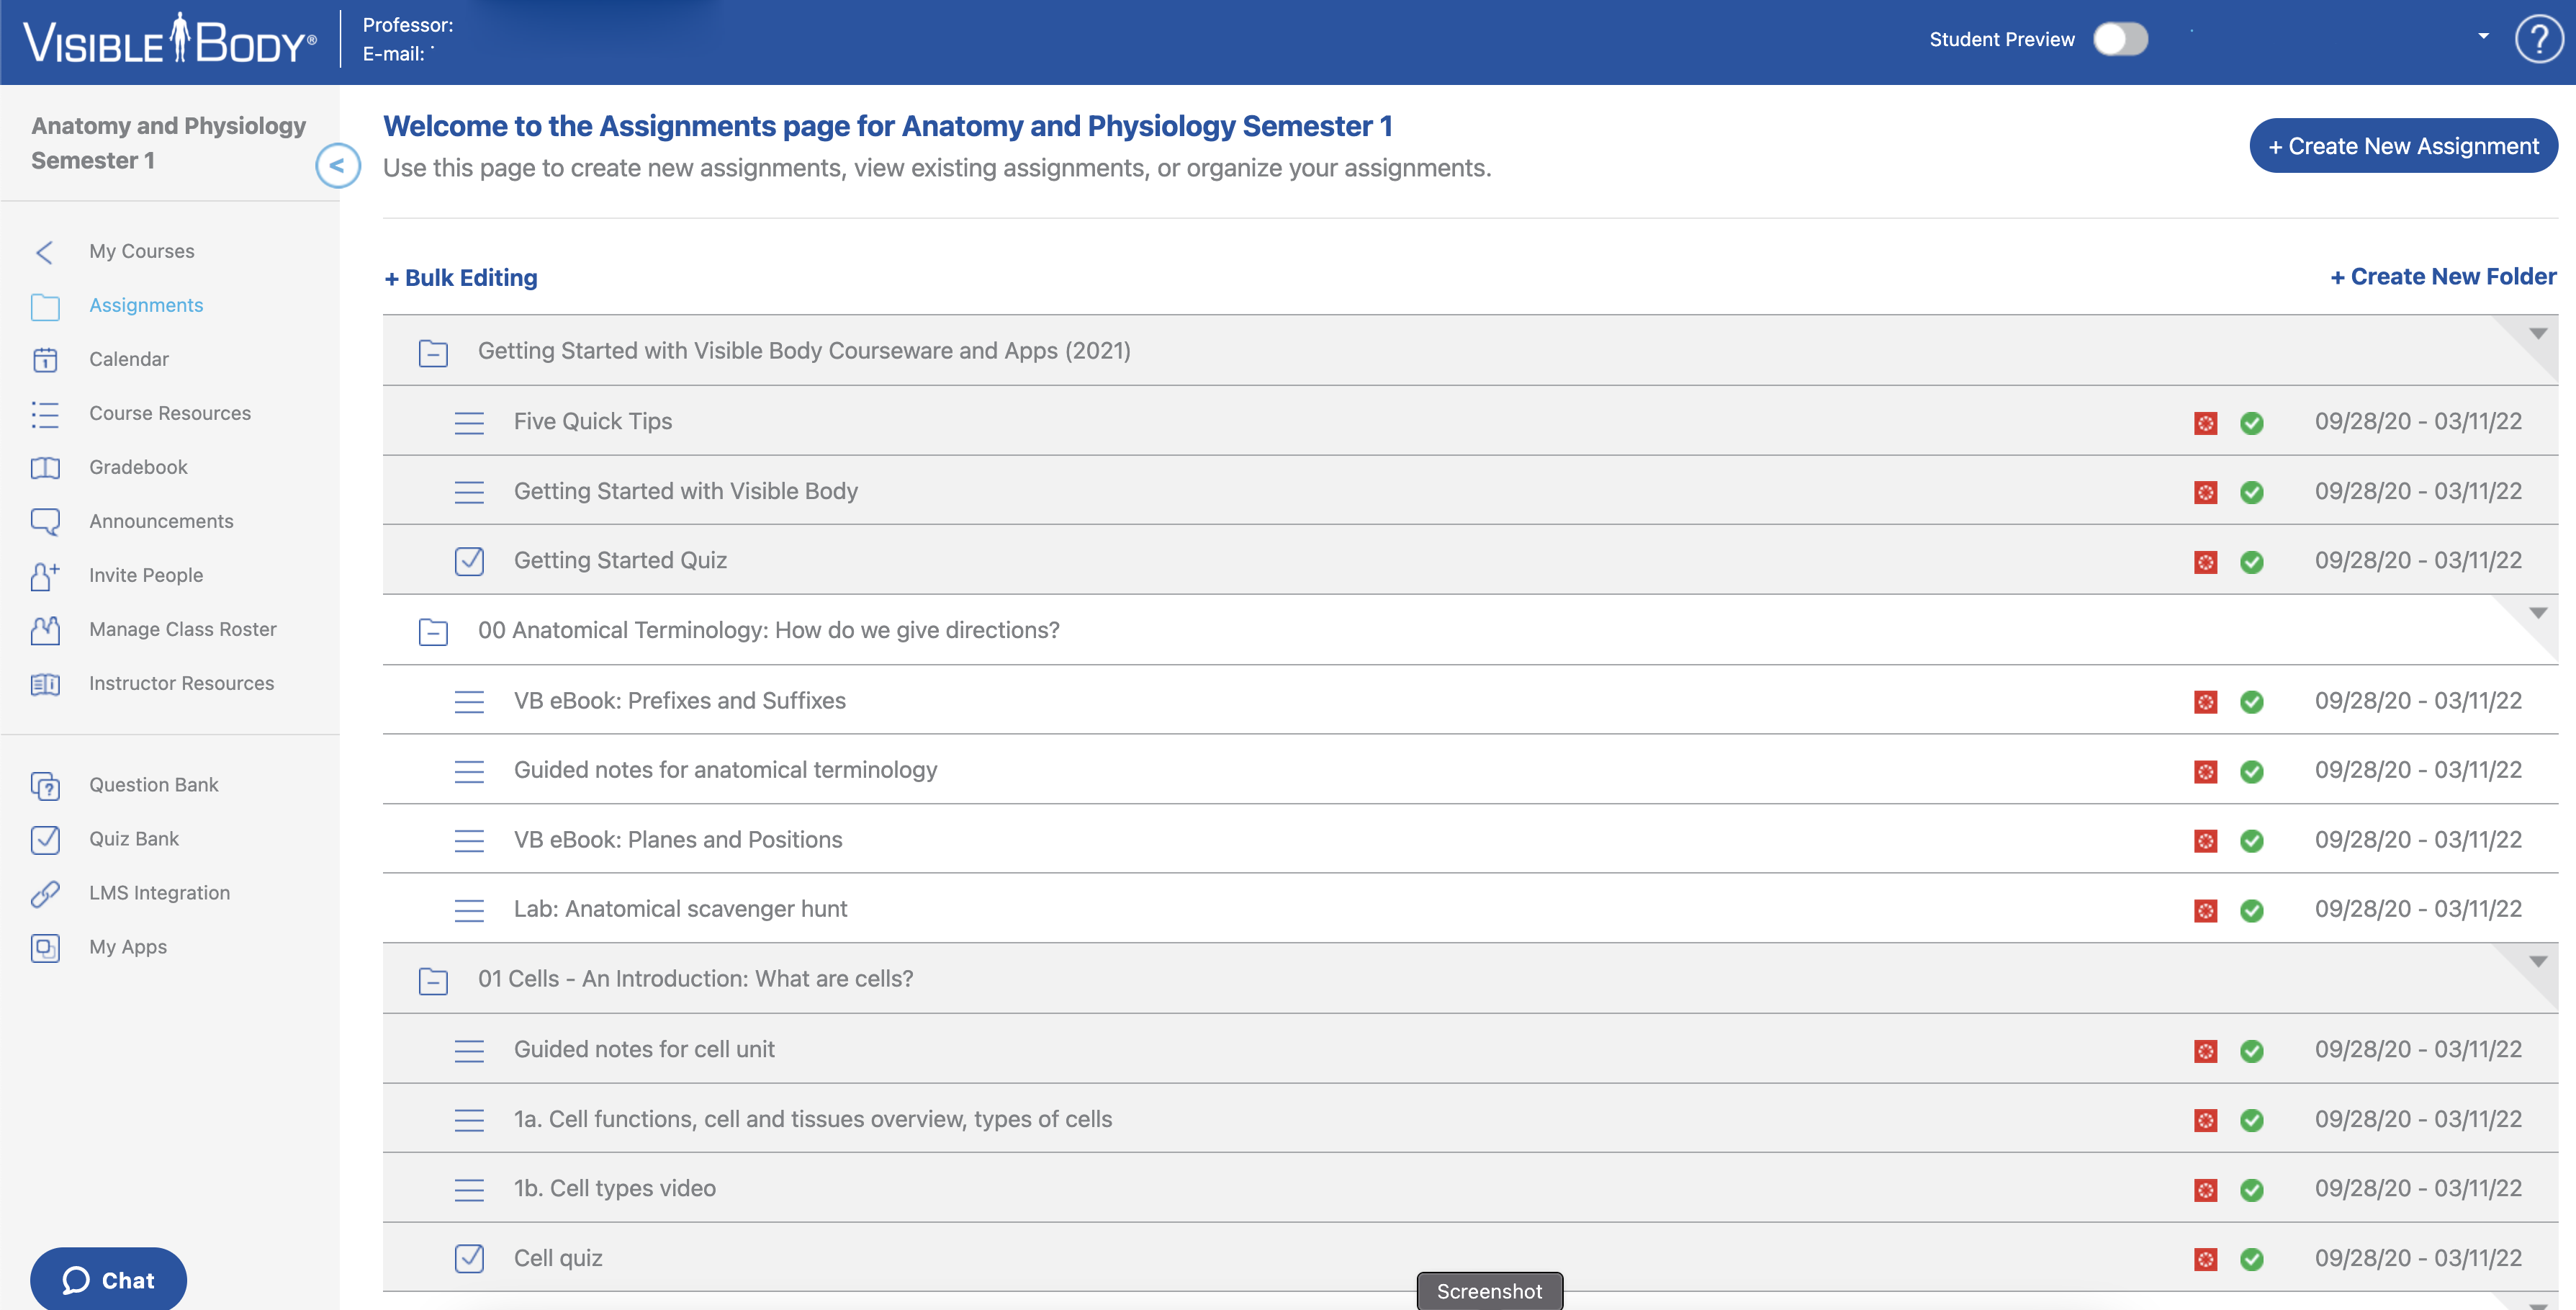
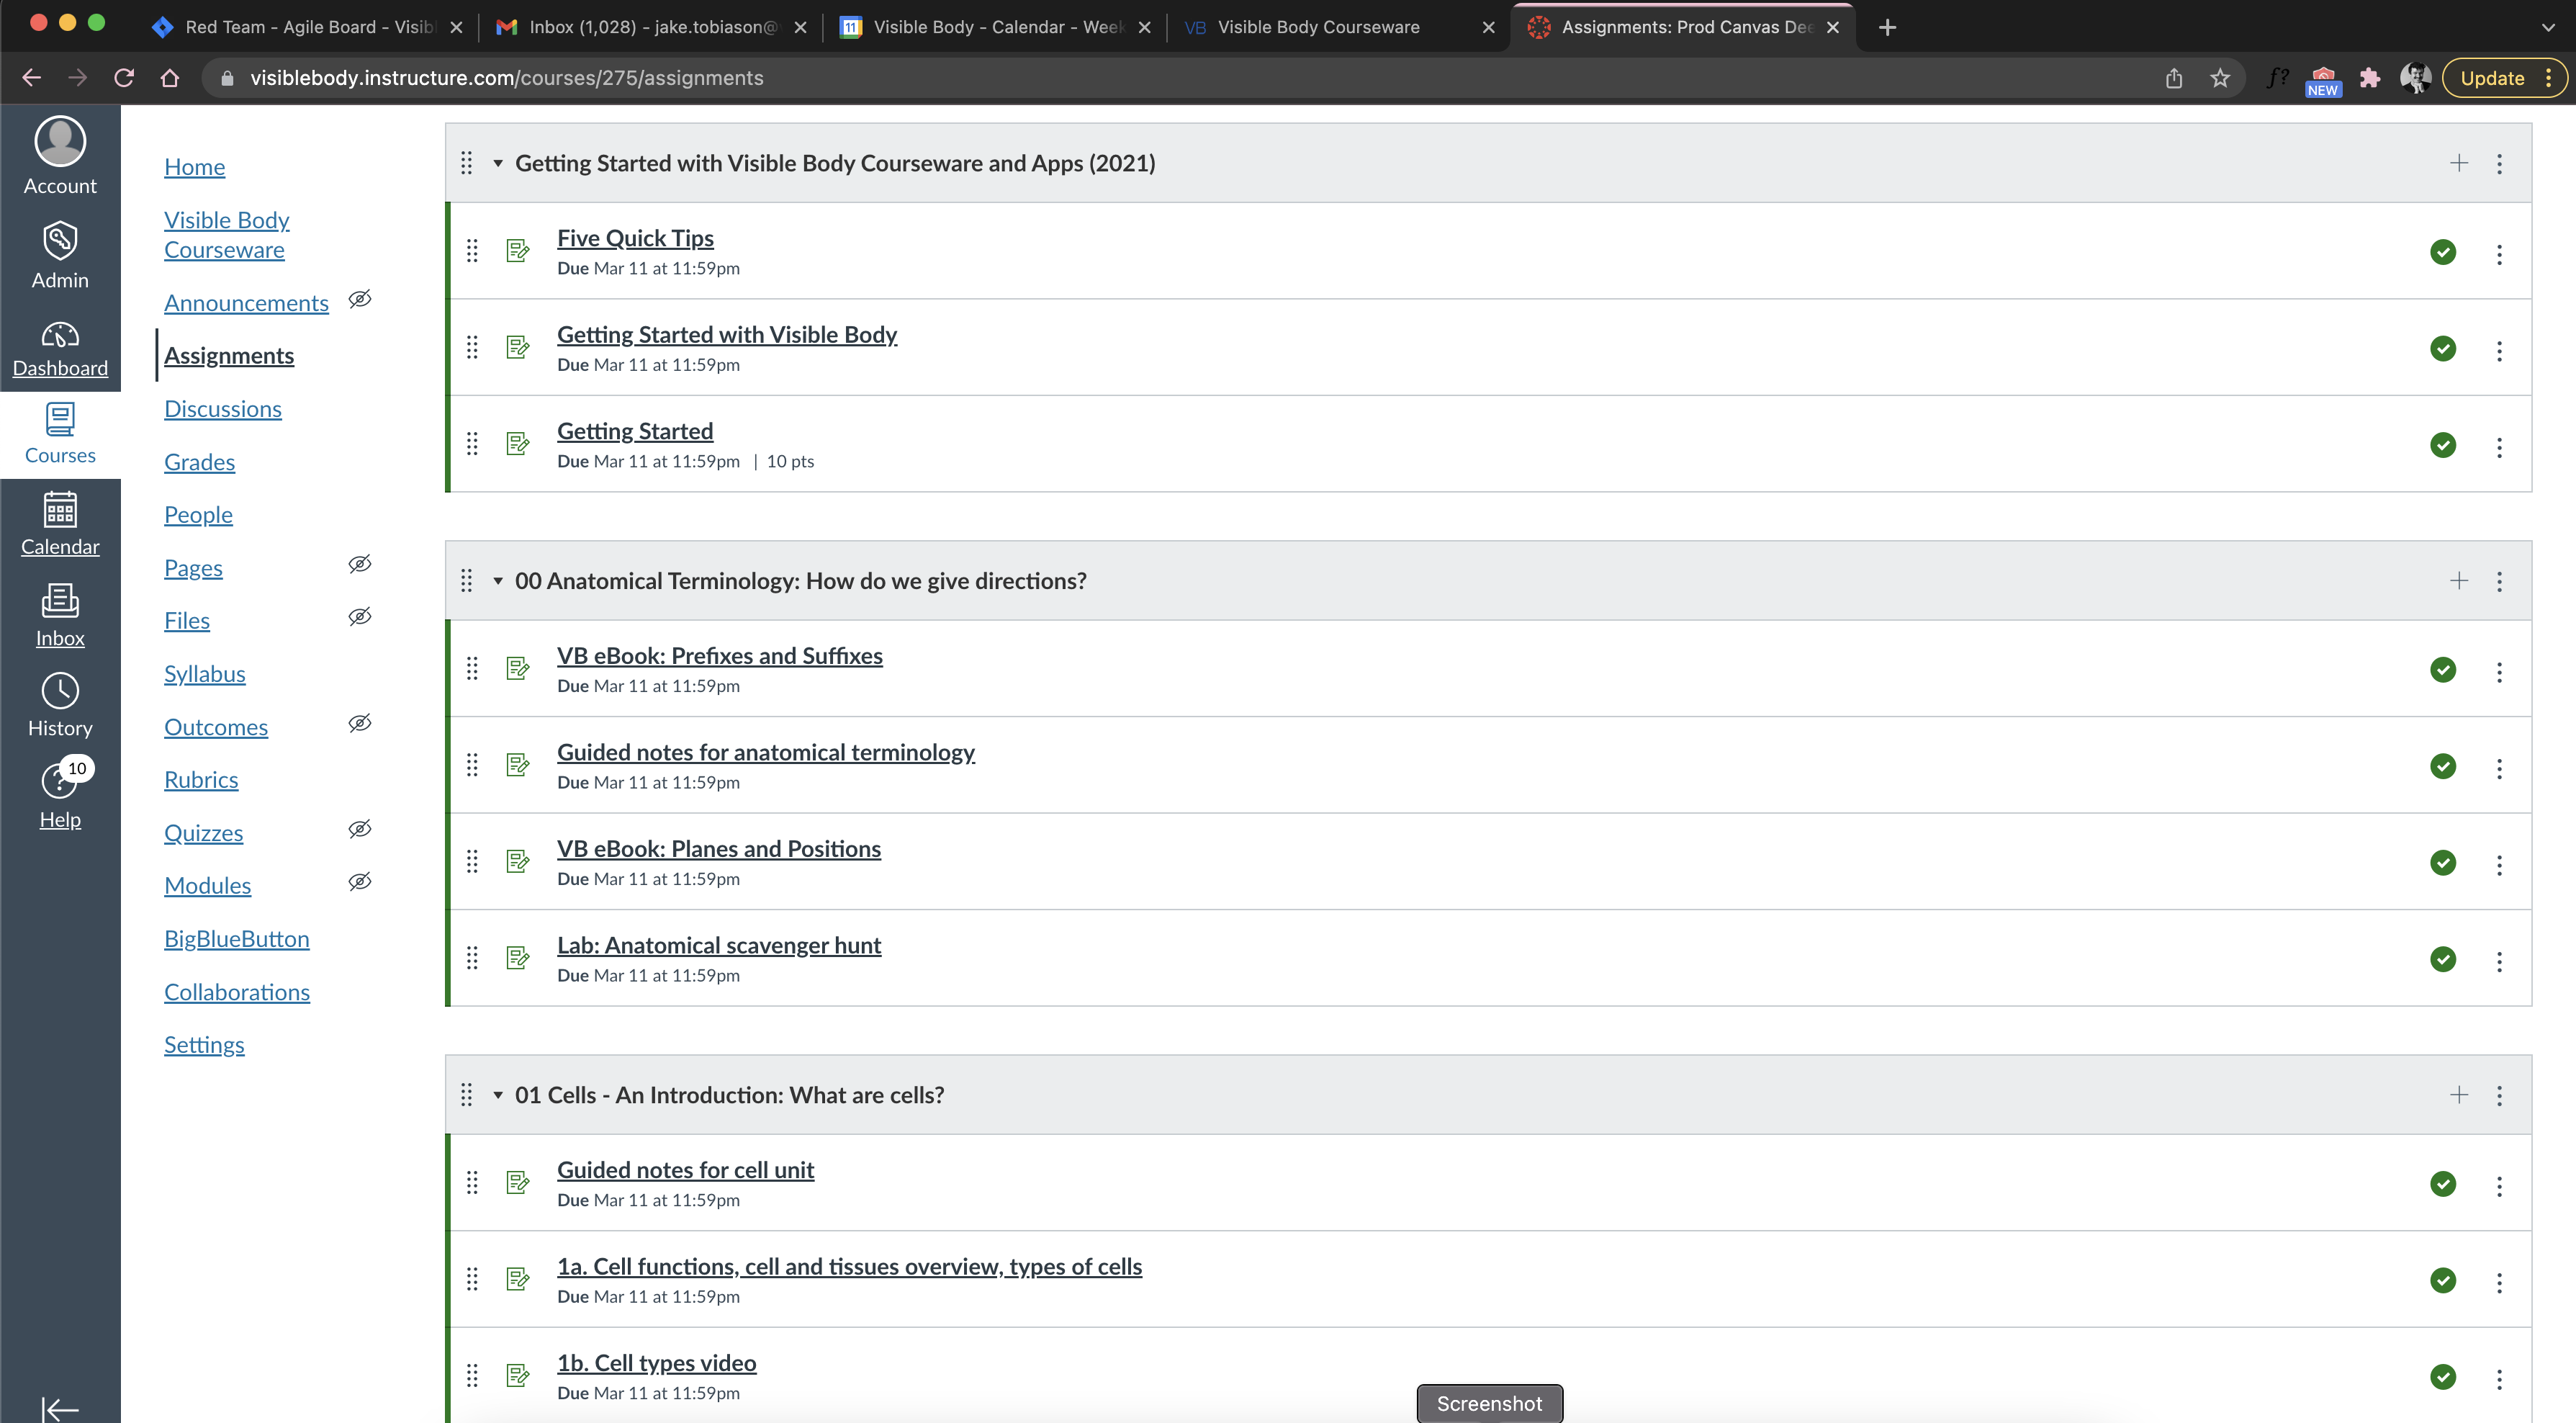
In Canvas, you will see all deployed Courseware assignments grouped in the same way as they are in Courseware. You can always reorder them in Canvas to suit your needs; it won't break the integration for these assignments.
Note: removed and added assignments will be placed under the original headers.
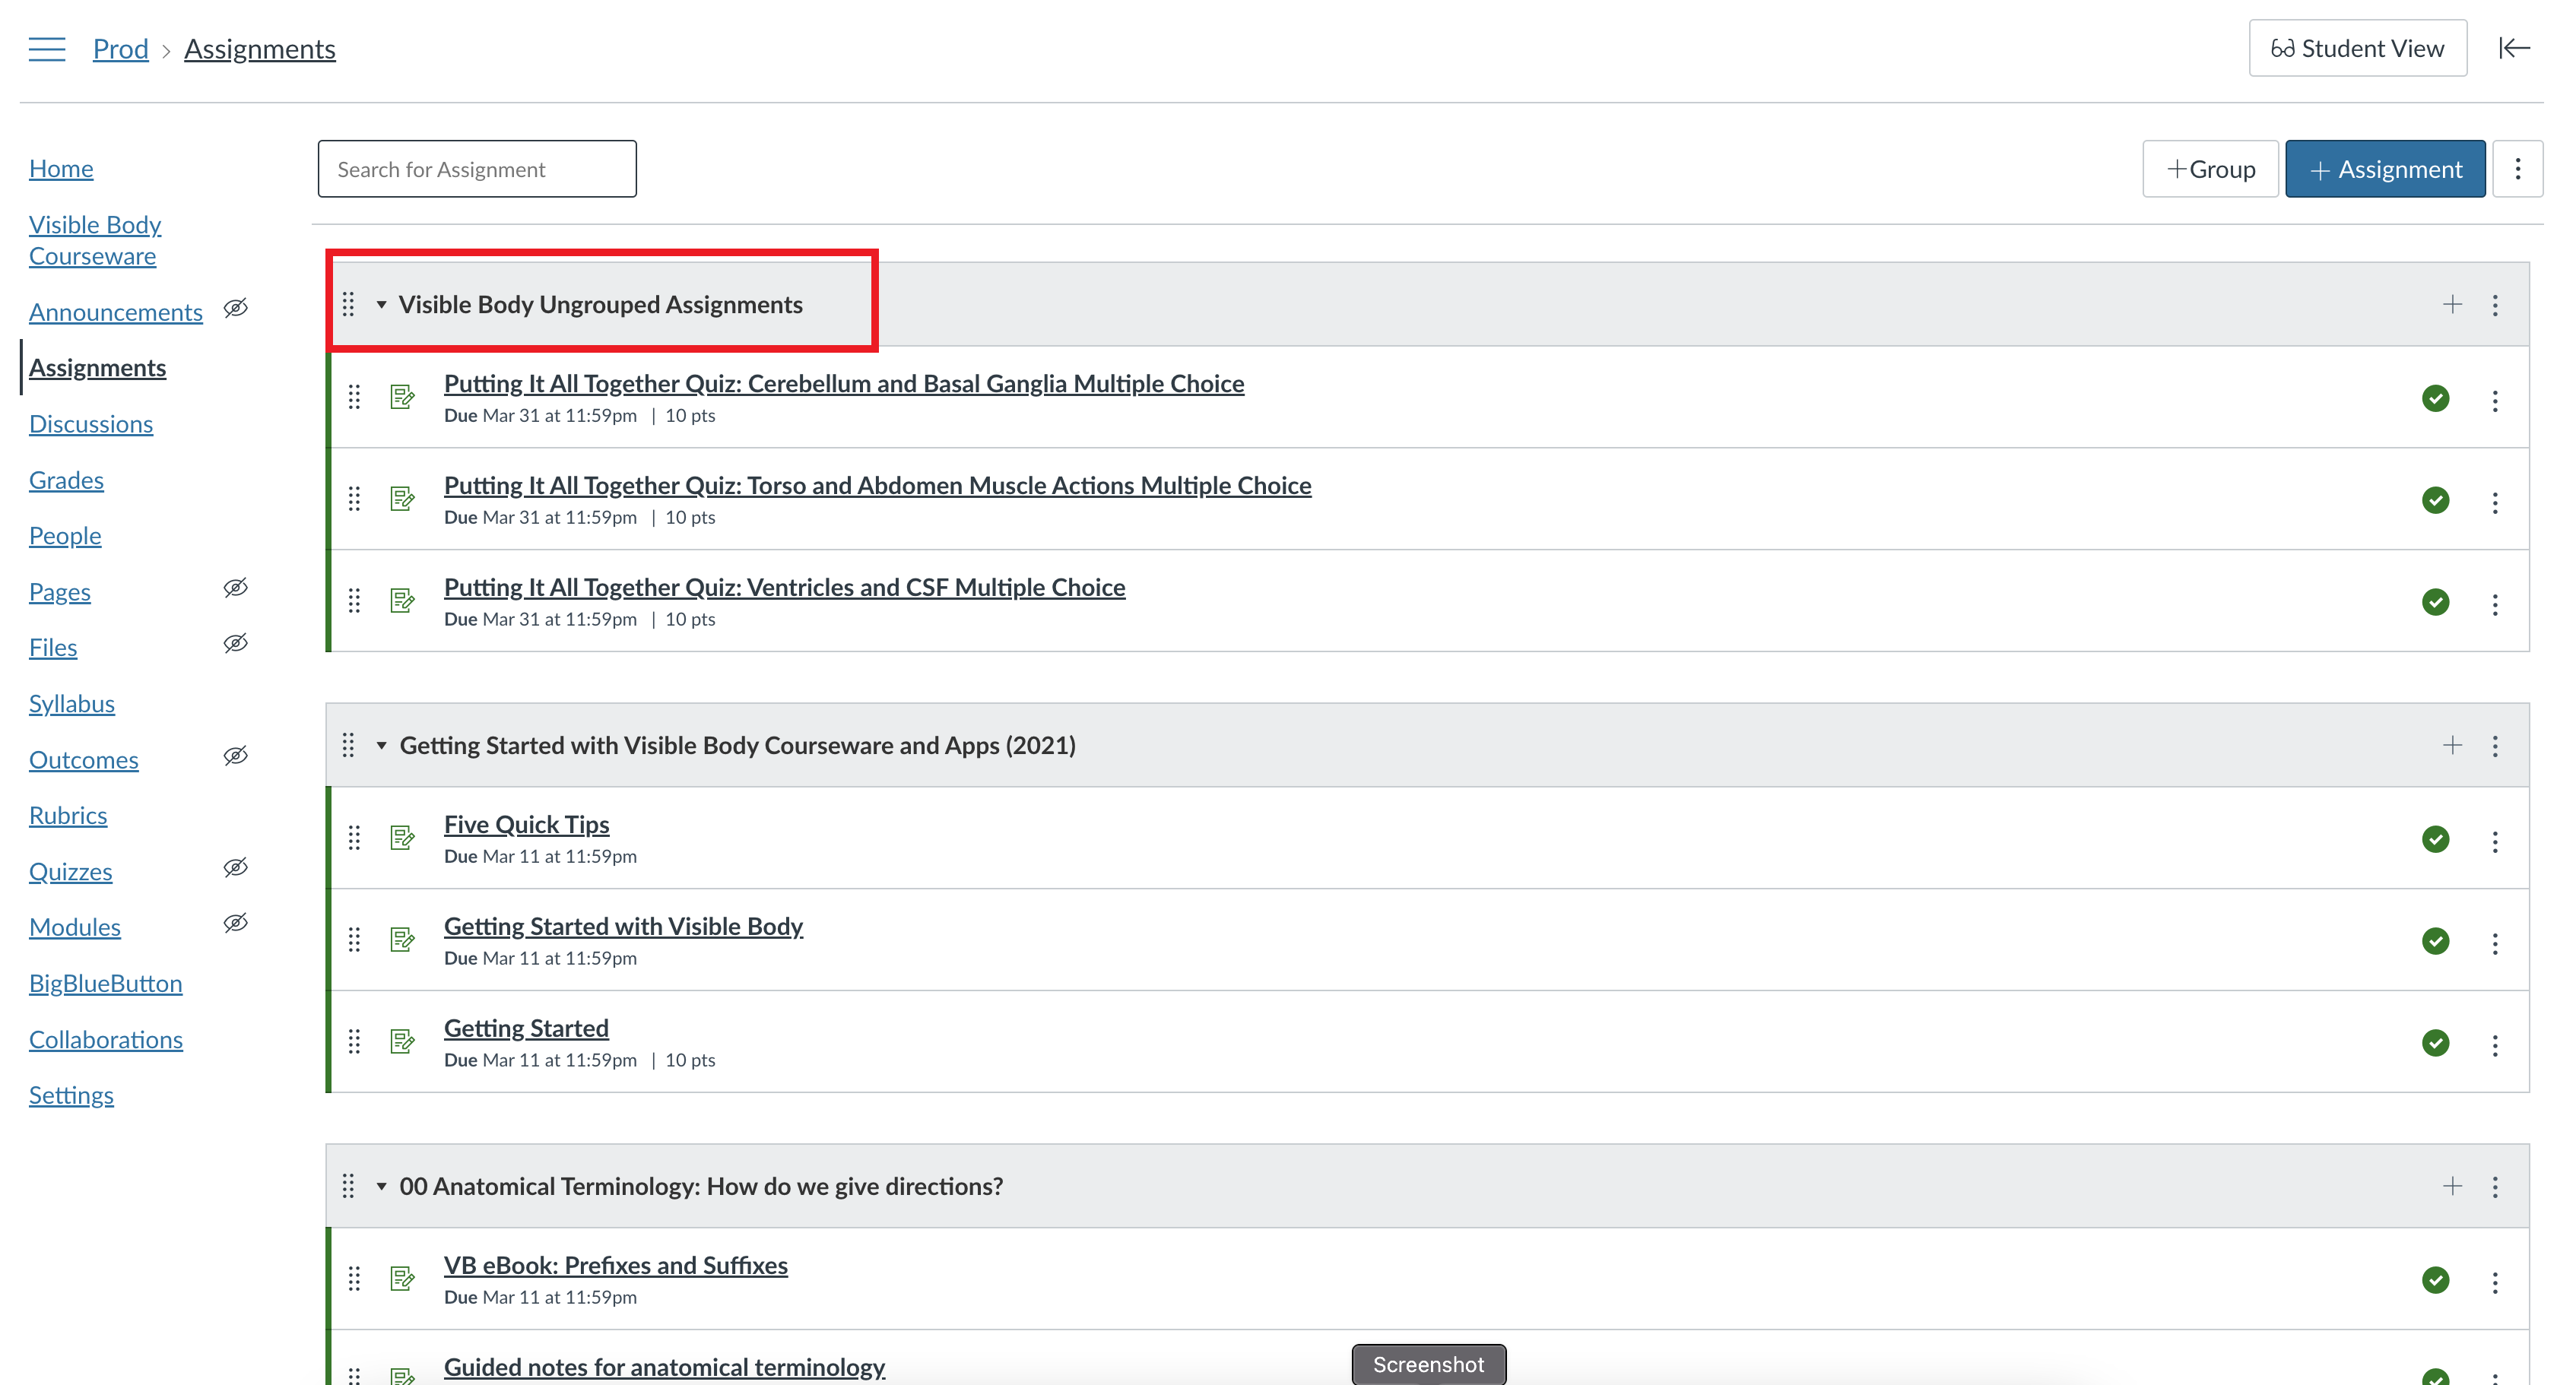
Canvas will automatically place ungrouped Courseware assignments in their own folder, "Visible Body Ungrouped Assignments" (pictured below).
Change Lite and Deep integrations between Canvas and Courseware
You can change your Canvas sync status anytime.
If you currently have a Deep integration and want to switch to Lite, you will not lose any grades in either system, but any subsequent scores from Visible Body will no longer be automatically reported to the Canvas gradebook. Simply switch the Deep Integration slider to the "off" position.
If you currently have a Lite integration and want to switch to Deep, you can select which assignments to sync so that those scores will be automatically reported to the Canvas gradebook.
Unlink a Courseware course
If you've accidentally linked the wrong Courseware course to your Canvas course or vice versa, you can follow these steps to unlink your courses.
- On the LMS Integration page, navigate to the Canvas subsection. You will see the listing of courses that are linked.
- Check off the radio button next to the pairing you want to unlink.
- Select the “Unlink Course” button, and confirm you want to unlink these courses by selecting “OK” in the pop-up. You will see a green confirmation message at the top of the screen that these two courses are now unlinked. Note: you can only unlink one set of courses at a time.
Enforcing Scopes
Scopes are optional. If schools prefer to enforce Scopes these are the specific scopes required for current Canvas Deep integration features:
Assignments
- url:GET|/api/v1/courses/:course_id/assignments
- url:GET|/api/v1/courses/:course_id/assignment_groups/:assignment_group_id/assignments
- url:GET|/api/v1/courses/:course_id/assignments/:id
- url:DELETE|/api/v1/courses/:course_id/assignments/:id
- url:PUT|/api/v1/courses/:course_id/assignments/:id
- url:POST|/api/v1/courses/:course_id/assignments
Assignment Groups (Folders)
- url:GET|/api/v1/courses/:course_id/assignment_groups
- url:GET|/api/v1/courses/:course_id/assignment_groups/:assignment_group_id
- url:POST|/api/v1/courses/:course_id/assignment_groups
- url:PUT|/api/v1/courses/:course_id/assignment_groups/:assignment_group_id
- url:DELETE|/api/v1/courses/:course_id/assignment_groups/:assignment_group_id
Courses
- url:GET|/api/v1/courses/:course_id/users
Submissions
- url:PUT|/api/v1/courses/:course_id/assignments/:assignment_id/submissions/:user_id