Spark Instructor Help
Video Tutorial: Import Multiple Students
Some schools require an access code for each student. You can roster students without entering their access codes. Students will be prompted to enter it when they sign in to Spark.
Select a course in Spark.
Click User Management in Spark.
Click
 › Students.
The Import Students menu opens.
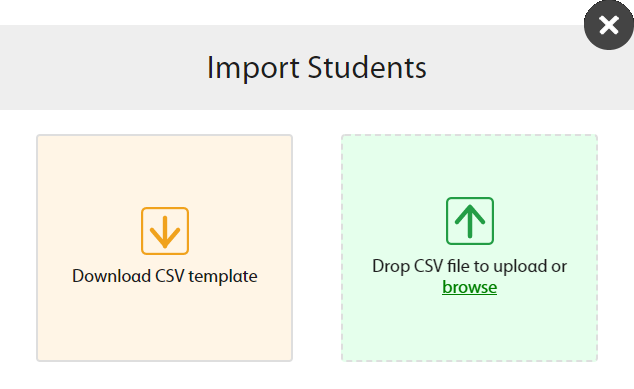
Click Download CSV template.
Open the template in a spreadsheet editing program such as Excel.
Enter student information.
You can enroll a student in as many as three courses.
- Username
The username for the account.
Usernames can include the following characters:
A B C D E F G H I J K L M N O P Q R S T U V W X Y Z a b c d e f g h i j k l m n o p q r s t u v w x y z 0 1 2 3 4 5 6 7 8 9 ~ ` ! @ # $ % ^ & * ( ) _ - + = { [ } ] | \ : ; " ' < , > . ? /- First Name
User's given name.
- Last Name
User's family name.
Optional: An email address where Spark can send the user a link to set their password, or verify their identity if they forget their password.
- Course Key 1
Your course's 8-digit identification code.
Course keys are shown on your dashboard after Key.
- Access Code 1
Optional: A 10-digit code that verifies a student may access Spark materials.
You can leave this column blank, and let your students enter their access code when they sign in to Spark.
- Course Key 2
Optional: A second course key is needed to add a student to a second course.
- Access Code 2
Optional: If your school uses access codes, a second access code is needed to add a student to a second course.
- Course Key 3
Optional: A third course key is needed to add a student to a third course.
- Access Code 3
Optional: If your school uses access codes, a third access code is needed to add a student to a third course.
Save your spreadsheet as a.CSV file.
Upload the file you just saved by dragging it to Drop CSV file to upload or clicking browse and selecting your file.

A message is shown in your Messages tab after each roster upload. It contains information about the created accounts or any errors.

Check your messages to be sure all users were added successfully.
Click the Messages tab, then click News.
If your upload had errors, click the Error Report to download a report explaining each error in your original document.
Common errors include not completing required fields or using an existing username.

Correct your.CSV file and import it again.
If your upload was successful, your message does not link to an error report.
Students in your roster are added to your course.