To allow assignment editing and preserve custom settings, first copy a course in WebAssign, then integrate the WebAssign course with your Canvas™ course.
- Prerequisites
- Course Copy Options
Copy a Section to a New Course
You can create a new single section course by copying an existing section with scheduled assignments that you want to reuse. After you create the course, you can change the assignment schedule and add more sections if needed.
Alternatively, see Create a New Single Section Course.
If you manage your K–12 course through NGLSync, see Copy Course in NGLSync.
This creates a new single section course with all of the assignments scheduled from the section being copied. In addition, many of the settings from the original section are copied.
The section being copied is not changed.
If you selected I want to look at ready-to-use assignments as a starting point, the available Course Pack assignments for your textbook are displayed. See Add Course Pack Assignments.
Always review the section schedule after copying. Usually, some changes are required for the new course. See Reschedule Assignments.
If your school should be billed for WebAssign access — common for high schools — set the student fee payment method for your new section to Bill Institution.
Integrate an Existing WebAssign Course With Canvas
If you already created the WebAssign course you want to integrate with Canvas — and no students are enrolled — integrate your existing course.
-
Create a course link or select learning activities to link from Canvas.
To create direct links to learning activities:
You can also create a course link with this option.
-
Select activities to include in your class.
Note
Selecting a group of activities does not select all activities in the group. You must select each activity individually.
Expand or collapse the course outline if needed.
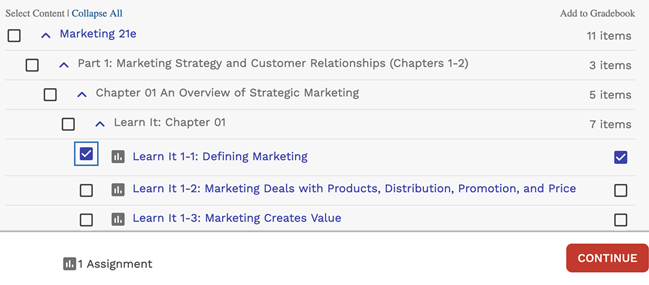
Graded activities that have already been added are marked
 . To avoid duplicate activity links and gradebook columns, do not
import the same activity twice.
. To avoid duplicate activity links and gradebook columns, do not
import the same activity twice.Due dates set in your WebAssign course are synced to Canvas. If your school uses a Canvas Partner integration, available dates are also synced to Canvas.
Date changes in your WebAssign course overwrite dates set in your Canvas course. For consistency, make sure your WebAssign and Canvas courses are set to the same time zone.
To create a course link only:
- Click Add Course Link.
-
Select activities to include in your class.